Rhubarb Rediscovery

It still seems strange to me to pay for rhubarb. Don't get me wrong, I'll gladly do it. But I can't help remembering when we were kids and it grew wild and in our parents' gardens like a weed that couldn't be got rid of. We plucked it and ate it with nothing more than sugar, making our own home-make "Lik-A-Stix" (anyone out there remember those?), with ziplock bags of sugar which allowed us to roam free with this mobile dessert. The most exotic it got was a pie. But this most versatile ingredient really never got used to it's full potential in my world. And then one day on Instagram you see people making beautiful tarts with rhubarb arranged so perfectly and you say - I'm getting in on that. So you roast the rhubarb with some vanilla and orange juice and you almost forget about the rhubarb itself because the resulting syrup is so sweet and tart. So you make yourself a little cocktail and then you start arranging things over a rich vanilla custard in the shape of the flooring you will have one day when you live in Paris. 

Roasted Rhubarb_© 2018 Helena McMurdo_7682.jpg
_© 2018 Helena McMurdo_7706.jpg
Checkered Rhubarb Tart_© 2018 Helena McMurdo_7751.jpg
Rhubarb Marquetry Tart_© 2018 Helena McMurdo_7080.jpg

And while you are proud of your work as a budding "rhubarchitect", what starts out as an obsession with geometry, changes quickly to an obsession with flavour and pairings. Would this roasted rhubarb be better with vanilla or ginger? Are pistachios a worthy addition to a tart? How can I mass produce this syrup to have it on demand for cocktails. Would it go better with gin or bourbon? And soon things are spiralling out of control and you are making rhubarb popsicles in the middle of day between photo editing sessions, (and photographing them of course because they are so darned pretty). 

But back to the cocktail because that's the real discovery on this rhubarb journey.

_© 2018 Helena McMurdo_8917.jpg

Rhubarb Whiskey Sour

1.5 oz bourbon

1.5 oz lemon

1 oz rhubarb ginger syrup *

1/2 an egg white

Pour all ingredients in a cocktail shaker with generous portion of ice, shake together, strain and serve.

* For the rhubarb syrup, mix 4 cups rhubarb,  1 cup sugar , 1 cup water and some fresh sliced ginger sliced in a small saucepan.  Boil for 5 mins and strain reserving rhubarb for another use (like on top of yogurt or porridge).

Cheers to Rhubarb!


If you enjoyed that cocktail and want to be surrounded by rhubarb all year long you might be interested in having a look at my Limited Edition Photographic Prints featuring some of my other rhubarb creations.

Happy Victoria Day: Victoria Sponge

In honour of Victoria Day, here's my not-so-classic take on a Victoria Sponge.

A Victoria Sponge also known as a Victoria Sandwich is a typical British teatime treat made with strawberry jam and butter icing, sandwiched between two layers of sponge cake. It was said to be a favourite of Queen Victoria's, and popular during her reign, hence the name.

Marmalade Victoria Sponge. Photography and Styling by Helena McMurdo, My Endless Picnic.

Instead of strawberry jam, I went with marmalade. I am a marmalade addict and lately my favourite comes from Le Meadows Pantry.  Her Grapefruit and Sea Salt Marmalade is absolutely divine.

Marmalade Victoria Sponge. Photography and Styling by Helena McMurdo, My Endless Picnic.


Marmalade Victoria Sponge

For the cake:

150 g butter

3 eggs

150 g flour

2 teaspoons baking powder

1 tsp salt


For the  filling:

60 g butter, soft

125 g icing sugar

3 teaspoons warm water

1/4 teaspoon vanilla extract

4-6 tablespoons of your favourite marmalade

Preheat the oven to 350 Degrees and baseline a 7 inch cake tin with parchment paper.

Sift or whisk together the flour, baking powder and salt and set aside. Cream the butter and eggs together until fluffy and then add the dry ingredients a little at a time. When mixed through, pour into the cake tin.

Bake for 45-50 minutes, or until a skewer inserted into the cake comes out clean. Remove from the oven and allow to cool on a wire rack. In the meantime, make the filling

Put butter, sugar, water and vanilla in a bowl. Beginning slowly at first and gradually increasing speed, beat with an electric stand or hand held mixer until the mixture is very light.

Slice the cooled cake through the middle so you have two layers. Spread the butter icing on to the cut side of the bottom half of cake and spread the jam on the cut side of the top half. Sandwich the two halves together and then dust with icing sugar.

Pour yourself your favourite blend of tea and enjoy like a Queen.


Happy Birthday South Granville Inhabiter

Last year around this time, I joined with two talented friends to start South Granville Inhabiter, a blog about living in our lovely Vancouver  neighbourhood of South Granville. This past week, we marked our one year anniversary, and you know me, I'm never one to pass up an excuse for cake.

Blueberry Victoria Sponge Birthday Cake © 2014 Helena McMurdo

In the next few weeks I'll be sharing some of my favourite images made for South Granville Inhabiter here on Endless Picnic, but for now, I'll revert to my usual subject matter and share the portraits of our birthday cake.

Blueberry Victoria Sponge Birthday Cake © 2014 Helena McMurdo

We chose a classic Victoria Sponge...well maybe not so classic. Rather than strawberry filling I used a mixture of blueberry jam and whole blueberries sandwiched with buttercream between two layers of sponge cake. I think the shot below is my favourite of the lot. It's so luscious and jammy.

Blueberry Jam and fresh blueberry filling for Victoria Sponge Birthday Cake © 2014 Helena McMurdo
Blueberry jam and  whole blueberry filling for Victoria Sponge Birthday Cake © 2014 Helena McMurdo

The finishing touch was provided by our logo dusted in sugar.  For that I had the able assistance of my South Granville Inhabiter colleague and talented illustrator Ženija Esmits who helped me by cutting out a fine template of the logo she had designed for the blog while I carefully went about the dusting.

Blueberry Victoria Sponge Birthday Cake dusted with South Granville Inhabiter Logo © 2014 Helena McMurdo
Blueberry Victoria Sponge Birthday Cake © 2014 Helena McMurdo

Almost too pretty to eat. Almost. 

Custard & Crumble Plum Tart

The rain is here but there are still plums in the markets and this tart is a perfect way to say goodbye to summer and hello to the fall. The custard cooks into the tart and gives it a certain, shall we say, gooey-ness. This is based on a recipe from an old Martha Stewart book. My favourite thing about the original recipe was the almond flavour imparted by the almond extract. My version increases the amount of almond extract and doesn't use any vanilla extract. I use prune plums because I like the way the little sliced pieces look when I arrange them on the top of the tart, but  but larger ones will do.

Plum Custard Crumble Tart © 2014 Helena McMurdo
Pieces of Plum Custard Crumble Tart © 2014 Helena McMurdo

Custard & Crumble Plum Tart

Crust & Crumble Base

218 g sugar

1/4 tsp salt

114 g (4 oz) cold butter, cut into cubes

Mix and rub together the above ingredients until you have a coarse meal. Divide the mixture in half  (about 257 grams each half) and set aside. To the remaining half add the following:

3/4 tsp cinnamon

1/4 tsp baking powder

1 egg

Press the wet mixture into a 9 inch tart pan. Bake in 320 oven for 10 minutes, then remove from oven and let cool.

While the tart is baking, prepare the custard as follows:


Filling & Custard

1 1/2 lbs plums, sliced in half or in quarters

1 egg

125 ml whipping cream

56 g sugar

2 tsp almond extract

Additional sugar for sprinkling.

Arrange the plums in a pattern of your choosing on the surface of the cooled tart crust.

Combine the egg, cream, sugar and almond extract in a bowl and beat slightly with a fork or whisk. Pour over the plums. Sprinkle the crumb topping you set aside earlier over the plums. Sprinkle approximately 2 tsp sugar over that.  Bake in a 350 F oven for 30 minutes. Then turn on the broiler and watching carefully, brown the top .

(Use your judgement - I sometimes feel like the remaining topping is more than enough so I often freeze any remaining crumb topping. It's great to have on hand for those times when you need an instant dessert - Just sprinkle over some fruit and your are done!)


Tarta de Santiago

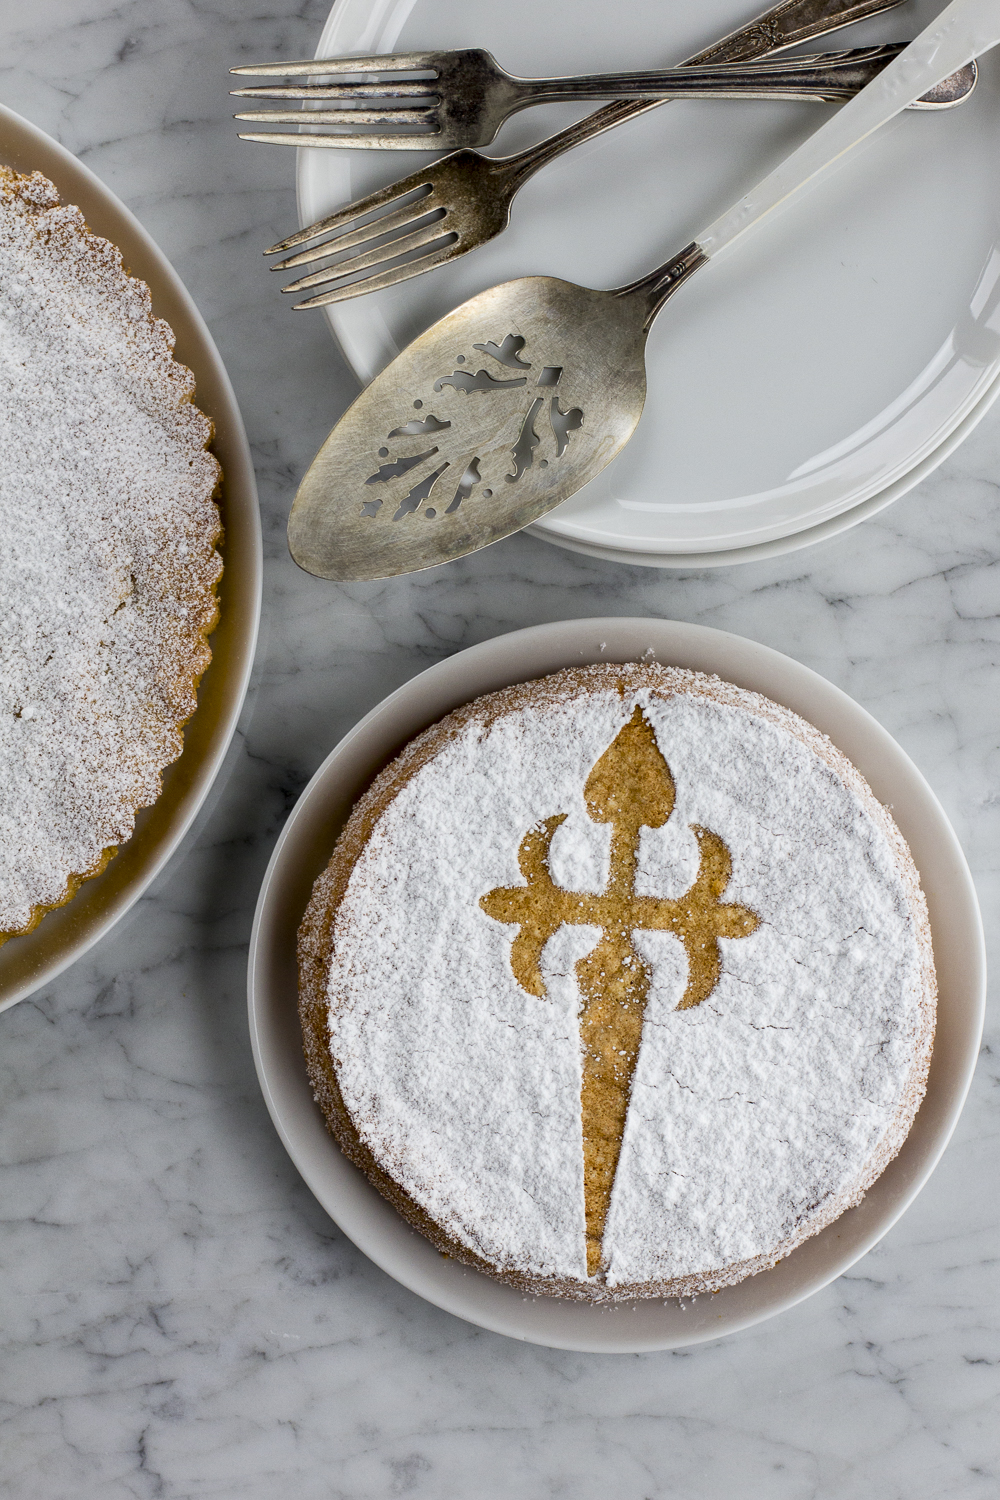
I've said it before. I don't really need an excuse to make a cake but in case you do, here's one. It's the  25th of July which is the Día de Santiago  (Feast of St. James), and also Galicia's National Day. It seems like an opportune moment to share this recipe for one of my favourite desserts: Tarta de Santiago.

Tarta de Santiago © 2014 Helena McMurdo

Every pastry shop you pass in Galicia, is sure to have one in the window, no matter what time of year, the top dusted in confectioners sugar save for the the distinctive cross of Santiago.

In Spanish St. James is called Santiago. Yes I know. It's confusing and I could probably do another post just on the variations of the name James. That's St. James the Great, one of the 12 Apostles of Christ and the patron saint not only of Galicia but also of Spain. 

Tarta de Santiago in a La Coruña cake shop. © 2014 Helena McMurdo

St. James has had a long association with Galicia. Tradition and legend has it that after St. James' death in 44 AD his relics were taken secretly to Galicia where whoever did the taking, seems to have forgotten about them for some time. But in the 9th Century AD, his burial place was rediscovered in what legend says involved a spectacular display of lights in the night sky. On the same site, several chapels and the present day Cathedral of Santiago were built which has since become one of the most important pilgrimage sites in the Christian world, surpassed only by Jerusalem and Rome. Today, hundreds of thousands of pilgrims religious and otherwise make their way to Santiago along the route that bears his name.

But back to the cake, because that's why you are really here. Isn't it?

I'm not sure I remember the first Tarta de Santiago I ever had. I've been eating them for too long. But it almost certainly came out of the ubiquitous blue box, found all over Galicia,  of the Tartas Ancano. They are available in every supermarket and gas station in Galicia. On our recent holiday, as we stopped to say goodbye to some neighbours and one of the slim packages was pressed firmly into my hands with the words, "this fits easily in the suitcase". I found this to be quite appropriate as, some say, the recipe for the cake originated with a pilgrim on a his way to Santiago. A travel cake! This makes sense because it keeps well and I would imagine if you found yourself walking for days from France to Spain you'd be pretty happy for a piece of this.

In May 2010, the EU gave Tarta de Santiago Protected Geographic Indication (PGI) status within Europe which allows only cakes made within the Autonomous Community of Galicia and containing at least 33% almonds, to be marketed as Tarta de Santiago meaning  that if you were thinking of starting up your own Tarta de Santiago bakery,  anywhere other than Galicia, think again.

Metal Cross of Santiago for making Tarta de Santiago © 2014 Helena McMurdo

But fear not, your physical location won't diminish your enjoyment of this cake. If you believe the British newspaper reports, even HRH Prince George had one for his birthday. Even if you are not Galician or Spanish, or aren't lucky enough to have a Spanish nanny, you can still enjoy this one.

With nothing but eggs, sugar, almonds, and a pinch of cinnamon and a zest of lemon, this cake appeals to me based on its pure simplicity. It is  filling and satisfying. I love to eat this on its own but topped with some fresh cheese it is truly divine. Some recipes call for a separate crust which is then filled with the cake mixture but I prefer this version - all cake!


Tarta de Santiago © 2014 Helena McMurdo

I finally bought one of the special cross templates this year in Spain but you can easily substitute a printed piece of paper which is what I did for many years before I had the fancy template. I've made a template for you to use which you can download here.


Tarta de Santiago

250 grams sugar

250 grams ground almonds, preferably Marcona

5 eggs, yolks and whites separated

pinch of cinnamon

zest of one lemon

Grease one ten-inch or two seven-inch springform pans and set aside. Preheat the oven to 320 F/ 160 C.  Beat the yolks and sugar together until they are well mixed. Add the almonds to this mixture along with the the cinnamon and lemon zest and mix until the almond is evenly incorporated, being careful not to overmix. Beat the egg whites until they have stiff peaks and then fold this into the yolk/almond mixture. The batter will remain slightly lumpy, but it should be evenly lumpy. Spread the mixture into the cake tin, place on a baking sheet and cook for approximately 40-50 minutes. The top of the cake should be a beautiful golden brown.

Remove the cake from the oven and let cool completely before removing from the pan. To decorate, place the template on the top of the cake and lightly dust with confectioner's sugar. If you decide to use another design, don't worry, it will taste the same. But it won't be a Tarta de Santiago. Enjoy!


Pear & Chocolate Almond Tart

Pear&AlmondTart©HelenaMcMurdo.jpg

I like dessert. I just do. In fact dinner doesn't seem finished until I've had it. Even if it's just a square of chocolate. Lately with all the fresh summer fruit that's around, I've been keeping some individual tart shells in the freezer so that I can experiment with different flavours and have dessert at a moment's notice.

The inspiration for this tart comes from some lovely Bosc pears that I collected for another project - a canned Pear and Vanilla preserve.  I had one lonely pear left and with it, was able to make these two lovely tarts.

The addition of chocolate seemed an appropriate nod to my almost namesake dessert Poire Belle Hélène. (When is chocolate NOT appropriate?)

These little tarts are rich and tasty and seem to be just perfect for the cooler weather.

Here's what you do for 4 tarts. (I halved the recipe to make 2)

Pastry

200 g (1 1/2 cups + 2 TBSP) all-purpose flour

50 g  (1/3 cup) ground almonds

75 g (1/3 cup) granulated sugar

160g (11 TBSP) salted butter at room temperature, cubed

1 egg yolk

Rub together with your fingertips, the flour sugar and butter until the mixture resembles coarse meal. Add the egg yolk and work through together with your hands. Turn out on to a floured surface and work it together into a smooth ball. Wrap in plastic wrap and place in the fridge for 30 minutes to rest. When the time has elapsed take the dough out of the fridge and wait for 10 minutes before rolling it out. I roll it between two sheets of parchment paper and then mark a circle around the tin and then use a palette knife to separate the pastry from the parchment, finally using the parchment to flip it into the tin. Line the individual tart shells. You can make the pastry in advance and freeze in the individual tart shells or freeze any extra pastry that you have. If you are working from frozen, take the shells out of the freezer about 1/2 an hour before you want to use them. If you are working from fresh, refrigerate the pastry shells while you make the filing.

Filling

56 g  (1/4 cup) butter

70 g (1/2 cup) powdered sugar

85 g ( 3/4 cup) almond flour/meal

1 TBSP all-purpose flour

1 egg

50 g chocolate (70% cocoa)

2 small Bosc pears

25 g  (1/8 cup) granulated sugar

1/2 tsp cinnamon

Slice the pears in half lengthwise and remove the core from each half with a melon-baller or spoon.  Now slice finely lengthwise, keeping the slices together and place on a plate. Squeeze some lemon juice over the slices to keep from browning while you make the rest of the filling.

Melt the chocolate slowly over a double-boiler while you make the filling (or cheat like I did and do it in the microwave.)

To make the filling, combine the butter and icing sugar until light and fluffy. Beat in the  flour and almond flour followed by the egg and the almond extract.

Divide the filling between the tart shells and spread evenly into each. Divide the chocolate between the shells, dropping it in spoonfulls over the filling. Run a knife through the chocolate to mix it slightly into the filling. Now place your pears, keeping the fine slices together in the centre of the tart shell and press down slightly so that the filling squeezes up around the sides and the slices separate ever so slightly. Combine the granulated sugar and cinammon and sprinkle over the pears.

Bake in a 325 oven for 50 minutes or until the pastry is nicely browned and the almond filling springs back when touched.

Now taste it. You're welcome!

Blueberry Apricot Custard Crumble Tarts

BlueberryApricotTarts©2013HelenaMcMurdo.jpg

So I'm sitting here writing this and there is literally sweat pouring down my temples and I'm wondering who in their right mind would attempt to bake anything on a day such as this. I arose early and was actually glad to see a cloudy sky thinking...ahhh some coolness.  This combined with an unexpected and very welcome gift of local blueberries on Friday night and the presence of a couple of apricots on my counter which in the words of my mother 'needed eating' sparked the idea.  Add to this the fact that I knew that way back, in the depths of my freezer,  were two beautiful previously prepped tart shells and we now had the perfect storm of conditions for my baking madness. So the oven was already preheating by the time I realized this was not going to be the cool day I had imagined. Oh well suck it up. I love it when conditions and and ingredients spring up to magically provide a recipe so here's what I came up with. Blueberry and Apricot Custard Crumble Tarts. A mouthful, you say? Yes it is. And you will like it.

I recently made a lovely lemon tart using a pâte sablée from one of my favourite books Classic Artisan Baking by Julian Day. This has become my new very favourite pastry. It is rich and buttery and almondy and well, it's just perfect. And it freezes very well so when I had some leftovers I immediately pressed them into two tart shells for future use and popped them in the freezer...where I found them today.

The other gift that allowed this to happen today was a crumble mixture that I also keep on standby in the freezer. I inevitably have too much of it whenever I make it and the first time this happened I froze it. It happened by accident the first time but the results were so good that I admit that now I make it in advance and always have some on stand by. I mean who knows when you could be called upon to provide a crumble at a moment's notice.  Don't say I didn't warn you.

Finally, this dessert makes use of a custard filling which I think is one of the loveliest parts of this dessert. It gives it a kind of bread-puddingy-ness (Yes, of course it's a word).

Blueberry Apricot Custard Crumble Tarts

For 4 tarts you will need:

Pastry

4  (4 inch) tart shells lined with your favourite pastry. I used pâte sablée from Classic Artisan Baking.  Before discovering this pastry I had no qualms of buying store-bought pastry (shock-horror!)  from people who were far better at pastry making than I was.  I like a sablée pastry for the almond flour which gives it such a richness.

You will need to follow the directions for your pastry and blind bake it. Usually this involves covering the shells with parchment or foil  and filling with baking beans before baking for about 15-20 minutes. (Depending on your pastry). Remove the beans and parchment and bake for another 5 minutes or so to slightly brown the pastry.  Remove from the oven and set aside to cool.

Custard Filling

1 egg

1/4 cup / 6o ml whipping cream

1 TBSP sugar

pinch of cinnamon

dash of vanilla or almond extract

Lightly beat the egg, add the cream and other ingredients, whisk and then set aside until needed.

Crumb Topping 

(makes more than enough to save for later)

1 cup / 227 grams sugar

1/4 tsp salt

1/4 lb / 113 grams cold butter

1/4 cups / 156 grams all-purpose flour

Combine first three ingredients cutting in the butter until the mixture resembles a coarse meal. Add the flour and rub together with your fingertips until the mixture has the texture of fine breadcrumbs.  Set aside until ready to use. Freeze what you don't use to for the crumbles of your future. (Just top your fruit with the mixture and you are good to go).

Fruit Filling

about 1  cup of blueberries

3 apricots, sliced

To assemble:

Once cool, fill the tart shells with a single layer of blueberries, then arrange the apricots on top to your liking. I used 5 apricot slices per tart but you could use more. Then fill in the holes/gaps with more blueberries.  Depending on how sweet your fruit is, you may want to sprinkle some sugar on the fruit at this stage. Taste it and make a call. Now pour the custard mixture over the tarts until the level of custard is just shy of the top of the pastry case. (Stir the custard before pouring as it may have settled). Finally sprinkle some of the crumble mixture on top. Really this part is up to you depending on how much crumble you prefer but I used about 2 TBSP per tart.

Bake at 350 until the crumb topping is golden brown and the custard and fruit juices are bubbling up through the top of the crumb.

Eat and enjoy while mopping the sweat from your brow and thinking how very clever you are!

Beef & Guinness Stew with Irish Brown Bread

IMG_2193

So if I haven't mentioned it before, I lived in Ireland for close to 9 years and in that time became a great lover of all things Irish, with the cuisine being no exception. So in honour of St. Patrick's day, I'm treating myself to some hearty Irish goodness inspired by my great friends in Ireland.

Please note, Beef  & Guinness Stew is NOT Irish Stew.  Irish Stew uses lamb and a stock base, and is more soup like. While I'm a huge fan of classic Irish Stew,  I'm quite fond of the Beef & Guinness stew for its hearty richness.

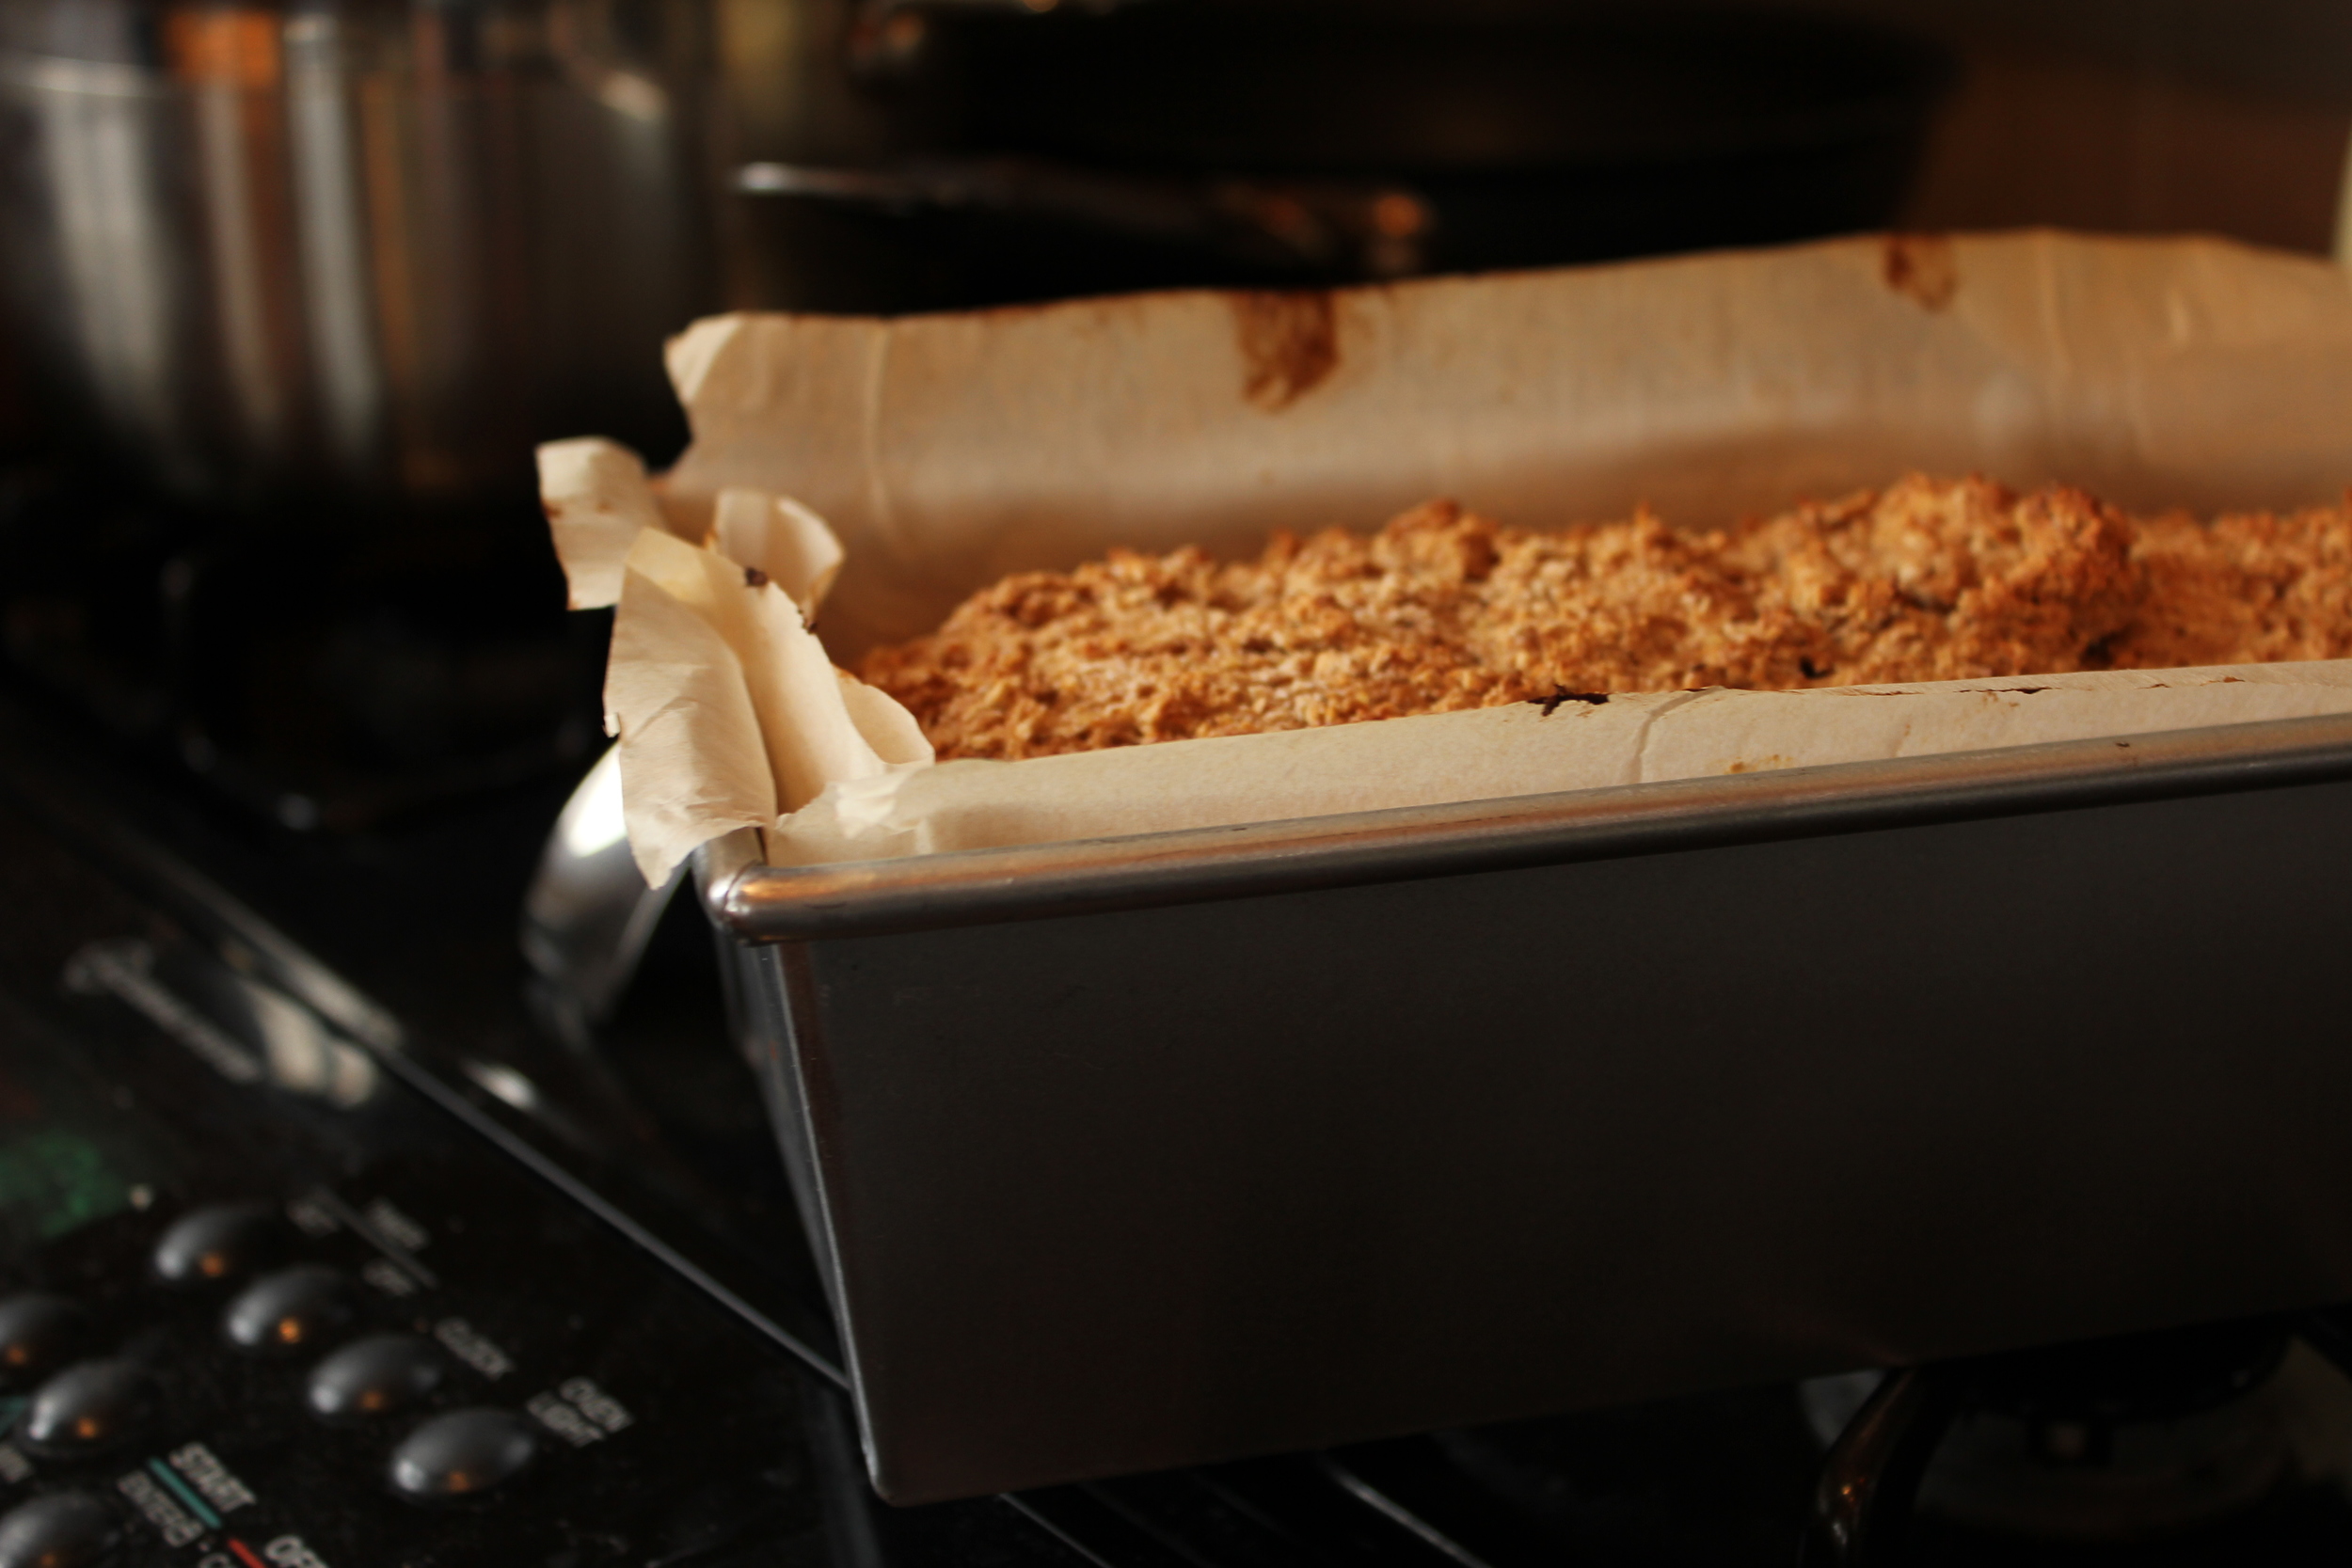
Irish Soda Bread. You will find both white and brown versions in Ireland. In the areas where I lived, brown soda or simply Irish Brown Bread was more popular. Butter is in my opinion the essential accompaniment. Soup and a slice of this bread. It's all you need for a delicious and filling lunch.

IMG_2237

Beef & Guinness Stew

My recipe is not very exact but I'll do my best to put it down as best I can.

1 lb stewing beef

1 pint Guinness

2 cups beef stock

1-2 carrots

1/2 large onion

2 stalks celery

6-8 mushrooms

Bouquet Garni of Rosemary, Thyme, Parsley

Roll the meat in seasoned flour, brown in small batches in a large casserole.  Set aside.

Add vegetables to casserole and coat with pan juices, softening for about 5-10 minutes.  Add the meat and juices back to the pan. Slowly add the pint of Guinness a little at a time, to build a rich gravy.  Cover with stock.

Cover and simmer for 2-3 hours in a slow oven.  (That'd be an expression I learned in Ireland for not very hot - say 250 - 300 F)

IMG_2288

Irish Brown Soda Bread

This recipe comes courtesy of my friend Oonagh (pronounced Oooh-NAH).  It is the easiest thing in the world to make and takes less than 10 mins to mix. (The hardest part is to line the tin). It's handy to have a kitchen scales for this recipe as the quantities are given 'Irish style' as weight, not cups like we use in Canada.

1. Line a bread tin with wax paper or baking parchment

2. Mix these dry ingredients together: 1 lb whole-wheat flour 2 oz Oat Bran 2 oz Wheat Germ 2 oz steel-cut oats 2 tsp Salt 1 1/2 tsp Baking Soda 1 tsp Baking Powder

3. In a separate bowl mix these wet ingredients: 1 TBSP Brown Sugar 1 Egg 1 TBSP OIL

4. Add Wet ingredients to Dry Mixture.

5. Add in 500 ml (roughly 1 pint) Buttermilk and mix lightly and quickly with spoon or fingers and place mixture in baking tin.

6. Bake at 400 F for 1/2 hour and then reduce heat to 350 F and bake for another 1/2 hour.

To serve, I'm partial to cold butter on the bread once cooled rather than melted butter. Try it and let me know.

IMG_2221

IMG_2221

OPTIONS / NOTES: I sometimes throw in a bunch of flax seed to the dry ingredients which makes it quite nice. Other note - in Ireland they have something called coarse meal flour which I have had no success finding in North America.  You can experiment by reducing the flour quantity slightly and topping up to the 1 lb measurement with wheat bran or additional wheat germ. The basic recipe works just fine though. When I'm making this I mix the dry ingredients the night before and then quickly add wet ingredients in the morning for fresh bread at breakfast.

IMG_2269

IMG_2269

Happy St. Patrick's Day. Beannachtaí na féile pádraig. And to all my friends back in Ireland, thinking of you and missing you much!