Cherry Clafoutis

During the height of summer, with Vancouver under an Air Quality Warning due to surrounding Forest Fires, and experiencing temperatures upwards of 30 Degrees C for some reason, all I was thinking about was baking. 

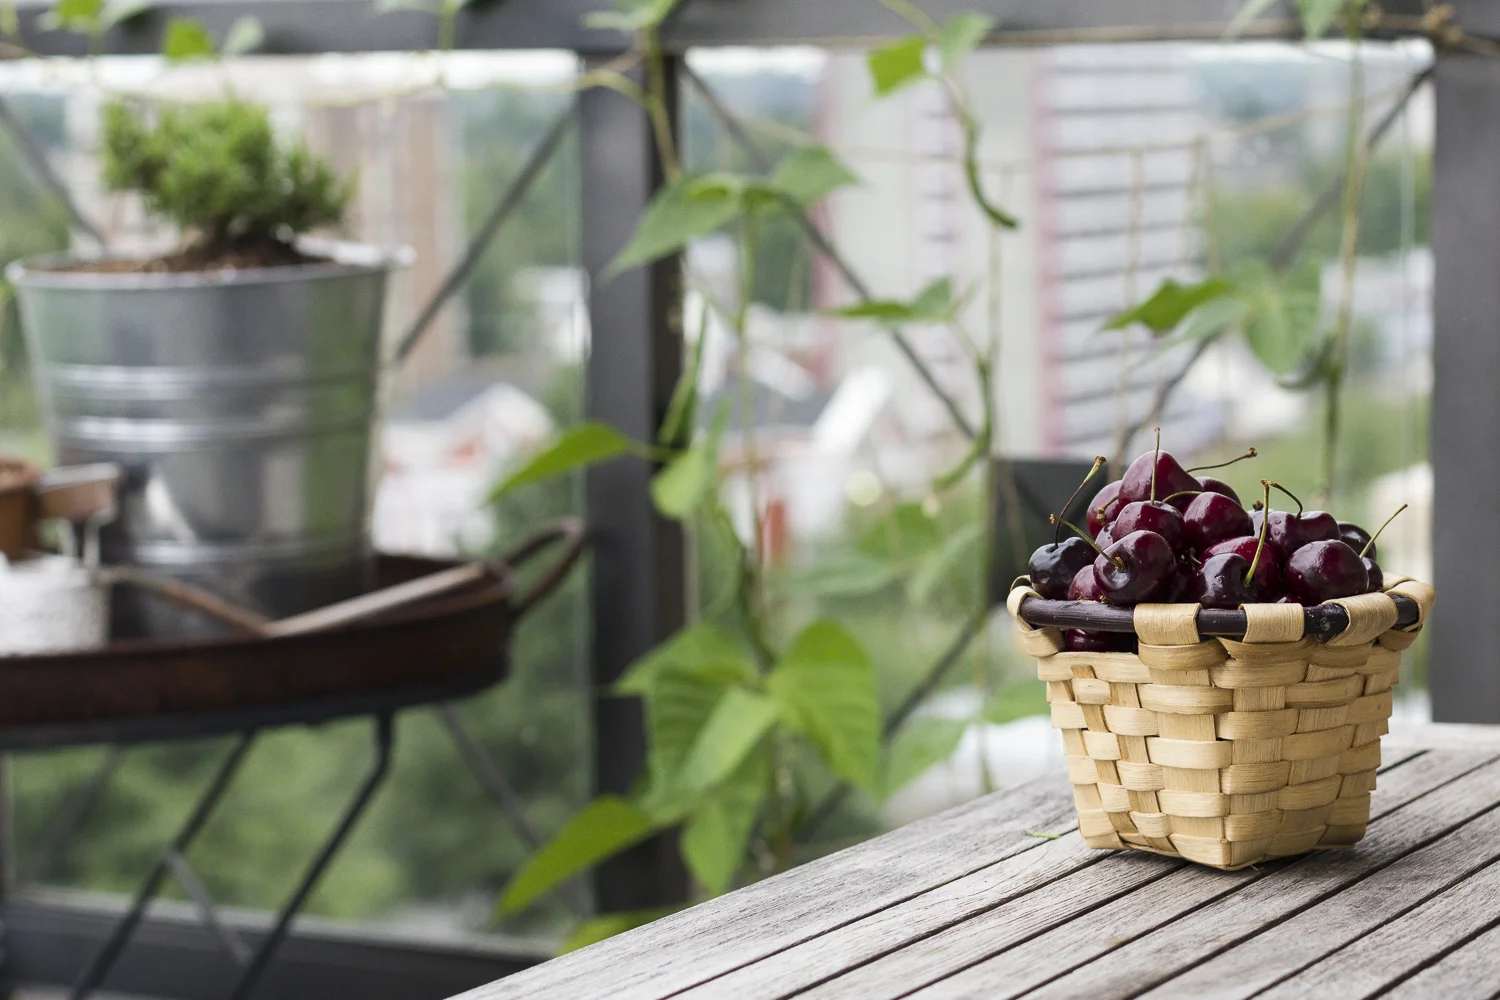
It had to do with these beauties that I saw at the Farmer's Market early in the season. For some reason, raw cherries and I have never been friends. Even well washed organic ones make my lips and mouth itch. It's not like I haven't tried, but I know when to stop.  Cooked cherries are another story - bring them on. We get on like a house on fire.

BC Cherries are perfect for Cherry Clafoutis. Photography by Helena McMurdo. Recipe on myendlesspicnic.com

A few weeks ago, a particularly clever friend of mine brought a delightful dessert to another friend's bridal shower: A Cherry Clafoutis. Delicious, of course. I have always wanted to make one and ever since then, the idea has been planted in my brain.

Pour the custard over the cherries to make a Cherry Clafoutis.  Photography by Helena McMurdo. Recipe on myendlesspicnic.com
Bake the cherry Clafoutis until it is golden. Photography by Helena McMurdo. Recipe on myendlesspicnic.com

Several attempts were made, some successful, others not. By my third try, I had enlisted the help of my three-year-old nephew and I think we cracked it. I thought give him the simple job of removing the stems of the cherries, but once he saw me with the cherry pitter in hand, there was no way that he was not having a part of that action. He performed admirably and remarkably, we and my mother's kitchen, emerged unscathed.

Soaking the cherries releases the juices. Photography by Helena McMurdo. Recipe on myendlesspicnic.com

It's wonderfully simple to make. In fact, a three-year-old can do it. The pitting of the cherries is the most time consuming element, but other than that, you are simply mixing up a custard with a consistency similar to pancake batter in the blender and pouring it over the fruit. And if you bake regularly, you'll have most ingredients on hand.

The cherry season started early this year and is finishing up now. As we move into the late summer, you can easily substitute plums. Just slice them in quarters and arrange them beautfully in the baking dish and follow all other steps in the same manner.

Allow the clafoutis to cool completely. Photography by Helena McMurdo. Recipe on myendlesspicnic.com

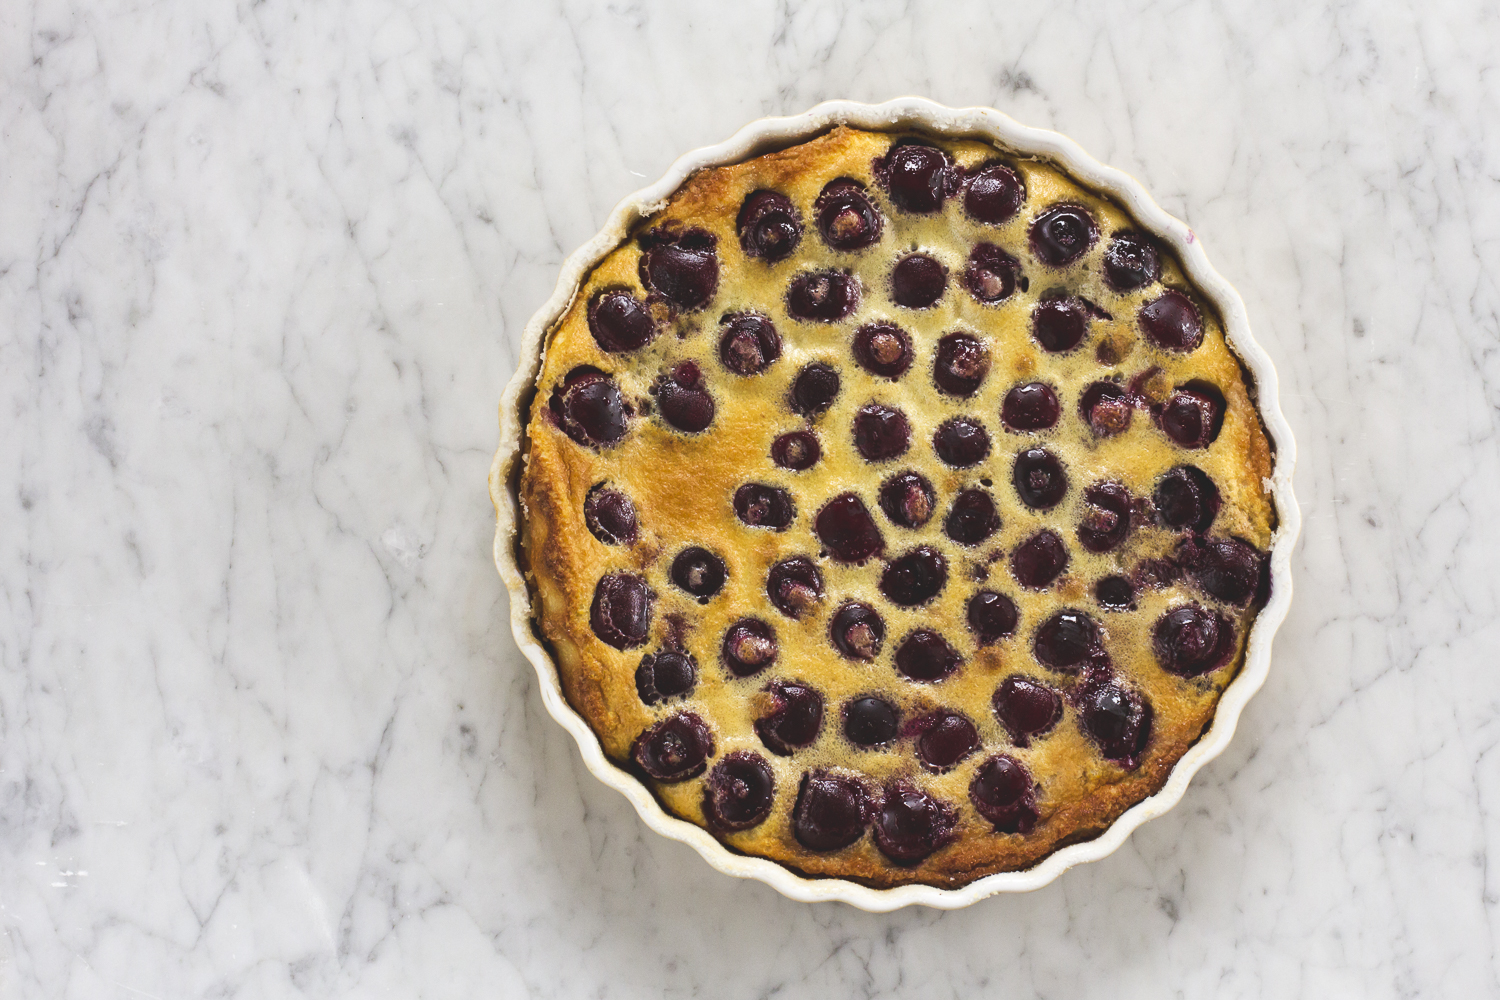
And of course, you must dust with powdered sugar. And then dust some more.

Cherry Clafoutis

I've based my recipe on this one from Simply Recipes with a few amendments. I found that soaking the cherries in brandy, (surprise, surprise) gave a great added flavour to the fruit. With this addition, I reduced the amount of almond extract slightly. I also increased the temperature to 375 which I felt worked better for the custard. My special tip is to dust the greased baking dish with sugar instead of flour which gives a lovely browned crust.  

about 2 cups of fresh sweet cherries, pitted
2 TBSP brandy
2 TBSP blanched slivered almonds
3 eggs
3/4 cup  sugar
1 TBSP brown sugar
1/2 cup of all-purpose flour
1/8 teaspoon of salt
1 cup of milk (2% is fine)
1/2 teaspoon of almond extract
1 1/2 teaspoons of vanilla extract
Powdered sugar for dusting
extra granulated sugar for preparing the baking dish

1. Grease an 8-10 inch ceramic pie dish, dust it with granulated sugar and pop it in the freezer while you prepare the fruit and custard.

2. Pit the cherries using a cherry pitter. Don't be a hero and try to do it without. Invest in this fabulous piece of equipment (which you can also use for olives).

3. Optional step - place the cherries in a bowl and pour over the brandy. Let soak for 1/2 hour at least, preferably more.

4. Make the custard by placing the sugars, flour, salt, milk and extracts in a blender and mixing thoroughly.

5. Remove the pie dish from the freezer and arrange the slivered almonds to cover the bottom of the dish evenly. (I originally ommitted this ingredient but in subsequent trials,  found the almonds to be essential.)

6. Arrange the cherries and any juice in the dish on top of the almonds.

7. Pour the custard mixture over the cherries and place in preheated oven.

8. Bake for 30 minutes or until the centre is just ever so slightly wobbly and the top is golden.

9. Allow to cool completely and then prior to serving, dust with powdered sugar.

10. If you can't finish it for dessert, eat the rest for breakfast.


Spicy Chicken Noodle Soup with Kale

I sort of feel like it's unfair to call this soup cooking because it's really repurposing a bunch of leftovers. But that doesn't make it any less delicious.

SpicyChickenNoodleSoup_HelenaMcMurdoPhotography

This chicken soup has been developed over time after countless chicken dinners and it more often than not involves a store-bought roast chicken. The kale was a 'what happened to be in the garden at the time' addition and there may be more or less vegetables depending on what happens to be in my fridge at any given time.

Celery_HelenaMcMurdoPhotography
Carrots_HelenaMcMurdoPhotography
Kale_HelenaMcMurdo Photography
RoastChicken_HelenaMcMurdoPhotography
Sofrito_HelenaMcMurdoPhotography
Noodles_HelenaMcMurdoPhotography

As for the chicken stock. I often end up using a mixture of my own quick stock, made from the chicken carcass topped up with some store-bought variety.

The special touch is a spoonful of homemade sofrito which I make in big batches and freeze in ice cube trays for when I need it. Sofrito is the onion and tomato base used for many a Spanish dish and I find to have this on hand is a wonderful thing. I use it constantly to add flavour to paella, soups or even to give extra dimension to a quick spaghetti sauce.  I use Ferran Adrià's recipe from The Family Meal, which you can find hereIf you don't have the sofrito on hand, you can substitute a spoonful of tomato paste.

PimentononSargadelos_HelenaMcMurdoPhotography

Finally I give this soup a shot of spice with pimentón picante, Spanish spicy smoked paprika.

The result is a robust, nourishing, soup that will take the chill off any day.

SoupSpoon_HelenaMcMurdoPhotography

Spicy Chicken Noodle Soup with Kale and Sofrito

Chicken Stock Ingredients:

Leftover cooked chicken with the equivalent of 1 breast and 1 leg remaining
10 peppercorns
1 bunch of parsley
1 bay leaf
2 stalks of celery, roughly chopped
2 carrots in large chunks
1 onion, skin on, split in half

Soup Ingredients:

2 litres chicken stock
1 stalk celery, finely diced
3 medium carrots, finely diced
1 medium onion, finely diced
1 to 2 TBSP sofrito
1 bunch of Kale
2 cups angel hair egg noodles
1 tsp pimentón picante (spicy smoked paprika)
Leftover cooked chicken with the equivalent of 1 breast and 1 leg remaining
Grated parmesan to garnish

Method:

1. Make the stock.

Remove the bulk of the meat from the chicken carcass and set aside in the fridge while you make the soup.

Place the chicken carcass in a pot with peppercorns, bay leaf, onion, carrot and celery and cover with water.

2. Simmer gently for 30 to 40 minutes

Pick any remaining meat and set aside. Dispose of the carcass and the vegetables. Drain the stock and set aside.

3. Sauté the mirepoix.

In a large pot, heat the olive oil and saute the onion, celery and carrots. 

4. Add stock.
Add your stock and top up with purchased chicken stock to make up the required quantity.

5. When the vegetables are cooked, add a tablespoon of sofrito (or tomato paste) and the kale. About 5 minutes later, add the noodles.

6. Cook until both the kale and the noodles are almost tender (about 5 minutes more).

7. Dice the chicken meat and add it to the soup.

8. Add the pimentón and season with salt and pepper.

9. Heat for an additional 5 minutes.

10. Serve with grated parmesan.


If you liked this post, and would like to receive posts like it directly to your inbox, why not sign up for my email updates here.

Kale Salad with Candied Walnuts, Dates & Preserved Lemons

Our preserved lemons are done. And by done I mean ready. Back in January we made two beautiful batches. I was introduced to these a few years ago by Mourad Lahlou. I reviewed his cookbook and subsequently had the great pleasure to interview him as well. We talked about food's ability to bring people together and the role of food and memory, themes that seem to pop up all the time for me. 

Preserved Lemons. Helena McMurdo Photography on Endless Picnic.

Before this, I'd never eaten preserved lemons, let alone considered making them, but once I tried them, I was hooked and so was G. In fact, in our house, because he likes them so much, it's now G who takes charge of this process in early January when the citrus is beautiful and lovely. Basically the scrubbed, quartered lemons are packed with kosher salt. They are squeezed into a litre size jar and then topped with lemon juice. Then they sit to and you wait for the magic to happen. The rind becomes beautifully tender and packs a salty, lemony punch. If you have never made preserved lemons, I encourage you to consult Mourad's excellent book for more details about how to prepare them and give it a go.

Removing the rind from the flesh. Preserved Lemons. Helena McMurdo Photography on Endless Picnic.

Now that ours are done we've been digging into them in every possible way. I'm popping a slice of the rind in my gin and tonic, we're using them to top little anchovy toasts, (I prefer white anchovies in vinegar. G prefers the regular kind), and to make magical mouthwatering devilled eggs. 

Preserved Lemons. Helena McMurdo Photography on My Endless Picnic.

The subject of today's post is born out of a desire to put my preserved lemons to good use and to find yet another way to consume them, although, let's face it, I would be perfectly happy to eat the rinds straight out of the jar whilst watching television.

My inspiration comes from my friend Wendy, with whom I've shared many an interesting food conversation and who in her turn has convinced me to try an ingredient I already love in a new way. Kale. 

Kale. Helena McMurdo Photography on Endless Picnic.
Preserved Lemons. Helena McMurdo Photography on Endless Picnic.
Massaging the kale. Helena McMurdo Photography on Endless Picnic.

 I love Kale. I do. But up until recently I wasn't big on the raw version. I mean what's the point, when it tastes so good cooked with bacon or chorizo or in a hearty soup? But Wendy turned my head to the raw version when she introduced me to a fabulous kale salad that she featured last summer on her blog, The Garden Next Door, which is all about growing and eating your own produce. 

Since I found her salad I've made it in its original format and adapted it many times. And while I'm hardly going to go out and buy myself a kale smoothie, (sorry juicers - I don't get it), this salad has opened my eyes to a new way to enjoy kale. It's a salad that is extremely versatile with a nut component and a dried fruit component that can be easily switched out with other options. My desire to adapt it has very little to do with the quality of the original which is excellent but more to do with what might be in my cupboard at any given time. Wendy's original version calls for dates and almonds but I've used dried cranberries, raisins, pine nuts, walnuts and so on.

Honey Kissed Walnuts. Helena McMurdo Photography on Endless Picnic.

For today's version, I'm keeping the dates, substituting the lemon juice for the liquid from the preserved lemons and using a little more honey and a little more heat  than the original recipe, to counteract the salty punch of the lemons. Finally I'm adding a finishing touch of sweetness with the addition of honey-kissed walnuts.

I love to make this salad any time, but it's perfect for a pot-luck or party because so much of the preparation can be done the day before.

Kale Salad with Dates, Candied Walnuts & Preserved Lemons.
Preserved Lemons. Helena McMurdo Photography on Endless Picnic.

So that's the story of how we got to here, by sharing stories and learning from others, checking our cupboard stores and finding out what works. So with that in mind, I give you the following. 


Kale Salad with Dates, Candied Walnuts & Preserved Lemons

Kale Salad with Dates, Candied Walnuts & Preserved Lemons. Helena McMurdo Photography on Endless Picnic.

3 TBSP preserving liquid from preserved lemons
1 shallot, finely chopped
2 tsp honey (plus additional below)
1/2 tsp red pepper flakes
kosher salt to taste

2 bunches kale 
3 TBSP olive oil 
4 quarters preserved lemons, rind only

40 grams (1/2 cup) walnuts
1 TBSP honey
8 dates, pitted and chopped 
70 grams (1/2 cup) finely grated parmesan

1. Prepare the dressing.

In a small bowl, combine the preserving liquid, shallot, honey and the red pepper flakes. At this point, taste the liquid and if required, add additional kosher salt to taste. The preserving liquid is already quite salty so you may find you won't need any additional salt. Set the dressing aside.

2. Prepare the kale.

Begin by washing the kale and removing the central rib. Chop the kale into bite-size pieces and make sure it is well dried. Yes, I often chop the kale first and then spin it in a salad spinner to dry. It seems to be easier to handle this way. Now tip the kale into a large bowl along with the olive oil. Now massage it. Yes massage it. Now repeat. You can read all about what Wendy says about massaging and it's true. It helps to soften up the kale and makes it more palatable in its raw format.

3. Prepare the preserved lemons.

Separate the rind from each of the lemon quarters with a sharp knife. Discard the flesh of the lemon or set aside for another use. Slice the rind into thin strips or dice finely as you prefer.

4. Dress the salad and refrigerate.

Combine the kale, dressing and preserved lemons and refrigerate for at least one hour. Ideally make the salad to this point the day before you wish to serve and it will be beautifully flavourful and the kale will have softened up nicely by the time you are ready to eat it.

5. Prepare the nuts

Chop the nuts into small pieces, quarters should do it. In a dry, hot frying pan, stirring all the time so they do not burn, toast the walnuts until golden. Remove the pan from heat, add 1 generous  TBP honey and stir rapidly to coat while the pan is still hot.  Tip the nuts out on to a sheet of parchment and set aside to cool.  

6. Finish the salad.

Add the cooled walnuts, dates,and parmesan to salad and toss it gently until it all leaves are thoroughly coated.

Enjoy.  I hope you will try it and please let me know in the comments how it works for you or what other ingredients you would make this with.

Hope you are all having a lovely weekend.


If you liked this post and would like to read more like directly in your inbox, sign up here.