Rhubarb Rediscovery

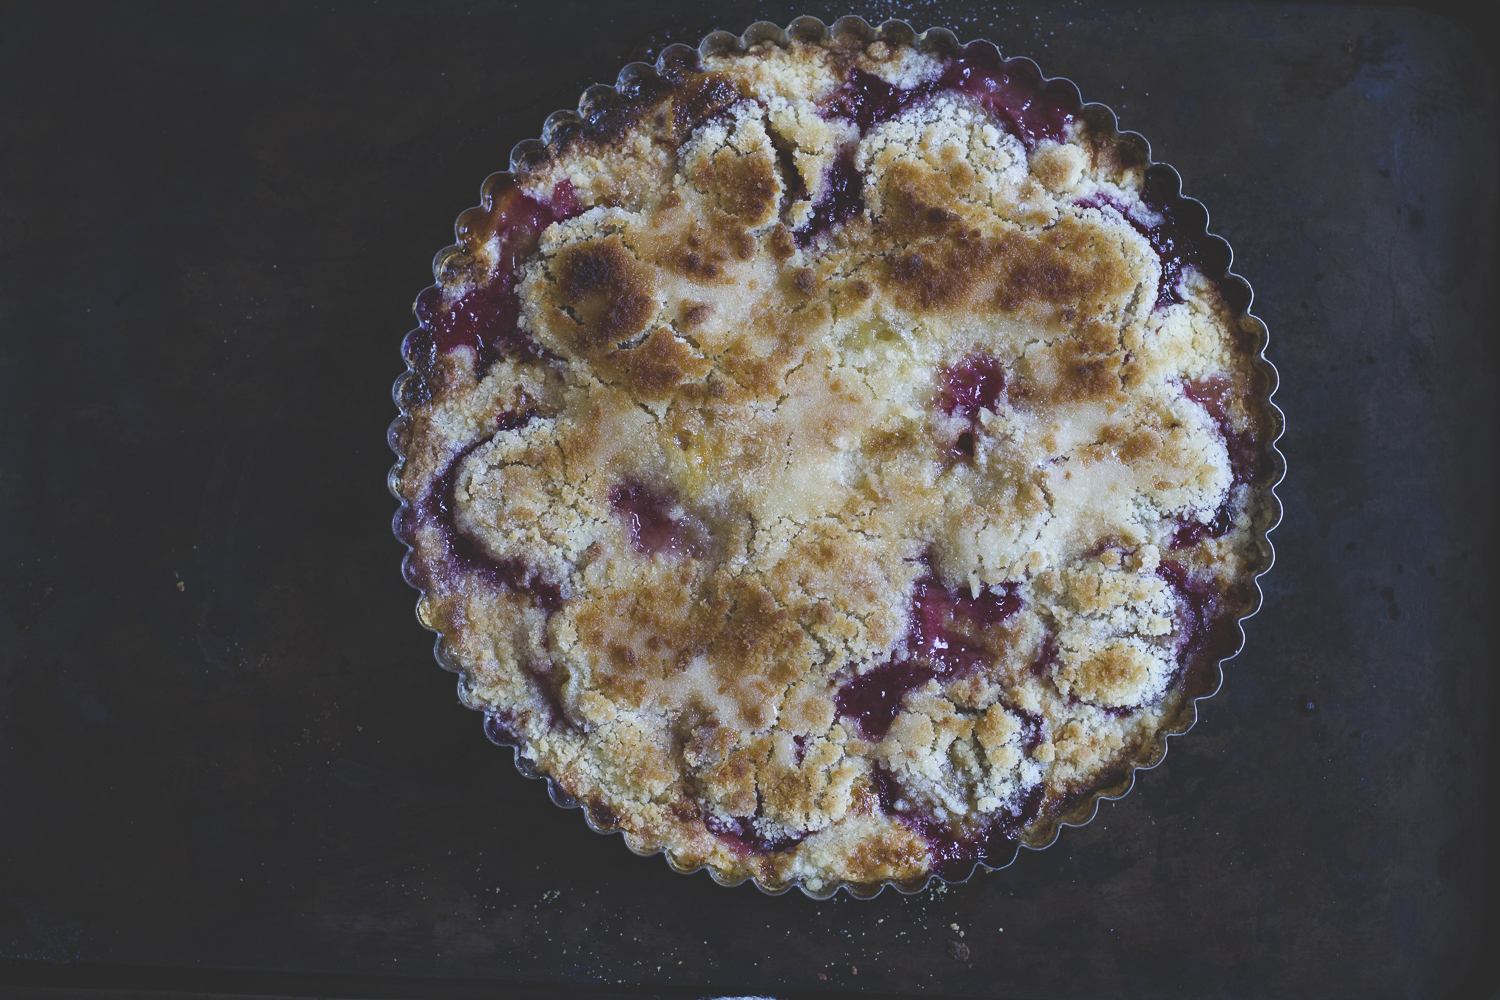
It still seems strange to me to pay for rhubarb. Don't get me wrong, I'll gladly do it. But I can't help remembering when we were kids and it grew wild and in our parents' gardens like a weed that couldn't be got rid of. We plucked it and ate it with nothing more than sugar, making our own home-make "Lik-A-Stix" (anyone out there remember those?), with ziplock bags of sugar which allowed us to roam free with this mobile dessert. The most exotic it got was a pie. But this most versatile ingredient really never got used to it's full potential in my world. And then one day on Instagram you see people making beautiful tarts with rhubarb arranged so perfectly and you say - I'm getting in on that. So you roast the rhubarb with some vanilla and orange juice and you almost forget about the rhubarb itself because the resulting syrup is so sweet and tart. So you make yourself a little cocktail and then you start arranging things over a rich vanilla custard in the shape of the flooring you will have one day when you live in Paris. 

Roasted Rhubarb_© 2018 Helena McMurdo_7682.jpg
_© 2018 Helena McMurdo_7706.jpg
Checkered Rhubarb Tart_© 2018 Helena McMurdo_7751.jpg
Rhubarb Marquetry Tart_© 2018 Helena McMurdo_7080.jpg

And while you are proud of your work as a budding "rhubarchitect", what starts out as an obsession with geometry, changes quickly to an obsession with flavour and pairings. Would this roasted rhubarb be better with vanilla or ginger? Are pistachios a worthy addition to a tart? How can I mass produce this syrup to have it on demand for cocktails. Would it go better with gin or bourbon? And soon things are spiralling out of control and you are making rhubarb popsicles in the middle of day between photo editing sessions, (and photographing them of course because they are so darned pretty). 

But back to the cocktail because that's the real discovery on this rhubarb journey.

_© 2018 Helena McMurdo_8917.jpg

Rhubarb Whiskey Sour

1.5 oz bourbon

1.5 oz lemon

1 oz rhubarb ginger syrup *

1/2 an egg white

Pour all ingredients in a cocktail shaker with generous portion of ice, shake together, strain and serve.

* For the rhubarb syrup, mix 4 cups rhubarb,  1 cup sugar , 1 cup water and some fresh sliced ginger sliced in a small saucepan.  Boil for 5 mins and strain reserving rhubarb for another use (like on top of yogurt or porridge).

Cheers to Rhubarb!


If you enjoyed that cocktail and want to be surrounded by rhubarb all year long you might be interested in having a look at my Limited Edition Photographic Prints featuring some of my other rhubarb creations.

Happy Victoria Day: Victoria Sponge

In honour of Victoria Day, here's my not-so-classic take on a Victoria Sponge.

A Victoria Sponge also known as a Victoria Sandwich is a typical British teatime treat made with strawberry jam and butter icing, sandwiched between two layers of sponge cake. It was said to be a favourite of Queen Victoria's, and popular during her reign, hence the name.

Marmalade Victoria Sponge. Photography and Styling by Helena McMurdo, My Endless Picnic.

Instead of strawberry jam, I went with marmalade. I am a marmalade addict and lately my favourite comes from Le Meadows Pantry.  Her Grapefruit and Sea Salt Marmalade is absolutely divine.

Marmalade Victoria Sponge. Photography and Styling by Helena McMurdo, My Endless Picnic.


Marmalade Victoria Sponge

For the cake:

150 g butter

3 eggs

150 g flour

2 teaspoons baking powder

1 tsp salt


For the  filling:

60 g butter, soft

125 g icing sugar

3 teaspoons warm water

1/4 teaspoon vanilla extract

4-6 tablespoons of your favourite marmalade

Preheat the oven to 350 Degrees and baseline a 7 inch cake tin with parchment paper.

Sift or whisk together the flour, baking powder and salt and set aside. Cream the butter and eggs together until fluffy and then add the dry ingredients a little at a time. When mixed through, pour into the cake tin.

Bake for 45-50 minutes, or until a skewer inserted into the cake comes out clean. Remove from the oven and allow to cool on a wire rack. In the meantime, make the filling

Put butter, sugar, water and vanilla in a bowl. Beginning slowly at first and gradually increasing speed, beat with an electric stand or hand held mixer until the mixture is very light.

Slice the cooled cake through the middle so you have two layers. Spread the butter icing on to the cut side of the bottom half of cake and spread the jam on the cut side of the top half. Sandwich the two halves together and then dust with icing sugar.

Pour yourself your favourite blend of tea and enjoy like a Queen.


Tinto de Verano

This is what we've been drinking lately. It's a childhood favourite. Yes that's right. When we visited Spain when we were kids, we were always permitted to have a small glass of wine cut with some gaseosa, a sort of 7-up /Sprite style drink that is slightly less sweet.

Later on,  but still many years ago, when I worked at Expo in Sevilla, now a grown-up, I rediscovered this drink and discovered it had a name: Tinto de Verano or Summer Wine. The bartenders would always ask 'Con limón' or "Con gasesosa?" giving you the option to have it with lemon Fanta which became my preference.  Sadly Lemon Fanta is hard to find in Canada, but I have found some good substitutes.

Tinto de Verano. Photo by Helena McMurdo. Recipe on myendlesspicnic.com

Santa Cruz Lemon Soda or Good Drink Organic Spritzer seem to work well. Both are slightly sweet which makes a good combination with the wine. Although excellent on it's own, I find Lemon San Pellegrino to be far too tart for this particular tipple.

I'd take this drink any day over Sangria which is far too headache inducing for me. When it's really hot, it's the only thing that I want.


Tinto de Verano

Red wine of your choice

Lemon Soda such as Lemon Fanta or Schweppes Limón

Fill a glass with ice, fill halfway with red wine. Fill in the rest of the glass with lemon soda.

Sip and enjoy.


Cherry Clafoutis

During the height of summer, with Vancouver under an Air Quality Warning due to surrounding Forest Fires, and experiencing temperatures upwards of 30 Degrees C for some reason, all I was thinking about was baking. 

It had to do with these beauties that I saw at the Farmer's Market early in the season. For some reason, raw cherries and I have never been friends. Even well washed organic ones make my lips and mouth itch. It's not like I haven't tried, but I know when to stop.  Cooked cherries are another story - bring them on. We get on like a house on fire.

BC Cherries are perfect for Cherry Clafoutis. Photography by Helena McMurdo. Recipe on myendlesspicnic.com

A few weeks ago, a particularly clever friend of mine brought a delightful dessert to another friend's bridal shower: A Cherry Clafoutis. Delicious, of course. I have always wanted to make one and ever since then, the idea has been planted in my brain.

Pour the custard over the cherries to make a Cherry Clafoutis.  Photography by Helena McMurdo. Recipe on myendlesspicnic.com
Bake the cherry Clafoutis until it is golden. Photography by Helena McMurdo. Recipe on myendlesspicnic.com

Several attempts were made, some successful, others not. By my third try, I had enlisted the help of my three-year-old nephew and I think we cracked it. I thought give him the simple job of removing the stems of the cherries, but once he saw me with the cherry pitter in hand, there was no way that he was not having a part of that action. He performed admirably and remarkably, we and my mother's kitchen, emerged unscathed.

Soaking the cherries releases the juices. Photography by Helena McMurdo. Recipe on myendlesspicnic.com

It's wonderfully simple to make. In fact, a three-year-old can do it. The pitting of the cherries is the most time consuming element, but other than that, you are simply mixing up a custard with a consistency similar to pancake batter in the blender and pouring it over the fruit. And if you bake regularly, you'll have most ingredients on hand.

The cherry season started early this year and is finishing up now. As we move into the late summer, you can easily substitute plums. Just slice them in quarters and arrange them beautfully in the baking dish and follow all other steps in the same manner.

Allow the clafoutis to cool completely. Photography by Helena McMurdo. Recipe on myendlesspicnic.com

And of course, you must dust with powdered sugar. And then dust some more.

Cherry Clafoutis

I've based my recipe on this one from Simply Recipes with a few amendments. I found that soaking the cherries in brandy, (surprise, surprise) gave a great added flavour to the fruit. With this addition, I reduced the amount of almond extract slightly. I also increased the temperature to 375 which I felt worked better for the custard. My special tip is to dust the greased baking dish with sugar instead of flour which gives a lovely browned crust.  

about 2 cups of fresh sweet cherries, pitted
2 TBSP brandy
2 TBSP blanched slivered almonds
3 eggs
3/4 cup  sugar
1 TBSP brown sugar
1/2 cup of all-purpose flour
1/8 teaspoon of salt
1 cup of milk (2% is fine)
1/2 teaspoon of almond extract
1 1/2 teaspoons of vanilla extract
Powdered sugar for dusting
extra granulated sugar for preparing the baking dish

1. Grease an 8-10 inch ceramic pie dish, dust it with granulated sugar and pop it in the freezer while you prepare the fruit and custard.

2. Pit the cherries using a cherry pitter. Don't be a hero and try to do it without. Invest in this fabulous piece of equipment (which you can also use for olives).

3. Optional step - place the cherries in a bowl and pour over the brandy. Let soak for 1/2 hour at least, preferably more.

4. Make the custard by placing the sugars, flour, salt, milk and extracts in a blender and mixing thoroughly.

5. Remove the pie dish from the freezer and arrange the slivered almonds to cover the bottom of the dish evenly. (I originally ommitted this ingredient but in subsequent trials,  found the almonds to be essential.)

6. Arrange the cherries and any juice in the dish on top of the almonds.

7. Pour the custard mixture over the cherries and place in preheated oven.

8. Bake for 30 minutes or until the centre is just ever so slightly wobbly and the top is golden.

9. Allow to cool completely and then prior to serving, dust with powdered sugar.

10. If you can't finish it for dessert, eat the rest for breakfast.


Spicy Chicken Noodle Soup with Kale

I sort of feel like it's unfair to call this soup cooking because it's really repurposing a bunch of leftovers. But that doesn't make it any less delicious.

SpicyChickenNoodleSoup_HelenaMcMurdoPhotography

This chicken soup has been developed over time after countless chicken dinners and it more often than not involves a store-bought roast chicken. The kale was a 'what happened to be in the garden at the time' addition and there may be more or less vegetables depending on what happens to be in my fridge at any given time.

Celery_HelenaMcMurdoPhotography
Carrots_HelenaMcMurdoPhotography
Kale_HelenaMcMurdo Photography
RoastChicken_HelenaMcMurdoPhotography
Sofrito_HelenaMcMurdoPhotography
Noodles_HelenaMcMurdoPhotography

As for the chicken stock. I often end up using a mixture of my own quick stock, made from the chicken carcass topped up with some store-bought variety.

The special touch is a spoonful of homemade sofrito which I make in big batches and freeze in ice cube trays for when I need it. Sofrito is the onion and tomato base used for many a Spanish dish and I find to have this on hand is a wonderful thing. I use it constantly to add flavour to paella, soups or even to give extra dimension to a quick spaghetti sauce.  I use Ferran Adrià's recipe from The Family Meal, which you can find hereIf you don't have the sofrito on hand, you can substitute a spoonful of tomato paste.

PimentononSargadelos_HelenaMcMurdoPhotography

Finally I give this soup a shot of spice with pimentón picante, Spanish spicy smoked paprika.

The result is a robust, nourishing, soup that will take the chill off any day.

SoupSpoon_HelenaMcMurdoPhotography

Spicy Chicken Noodle Soup with Kale and Sofrito

Chicken Stock Ingredients:

Leftover cooked chicken with the equivalent of 1 breast and 1 leg remaining
10 peppercorns
1 bunch of parsley
1 bay leaf
2 stalks of celery, roughly chopped
2 carrots in large chunks
1 onion, skin on, split in half

Soup Ingredients:

2 litres chicken stock
1 stalk celery, finely diced
3 medium carrots, finely diced
1 medium onion, finely diced
1 to 2 TBSP sofrito
1 bunch of Kale
2 cups angel hair egg noodles
1 tsp pimentón picante (spicy smoked paprika)
Leftover cooked chicken with the equivalent of 1 breast and 1 leg remaining
Grated parmesan to garnish

Method:

1. Make the stock.

Remove the bulk of the meat from the chicken carcass and set aside in the fridge while you make the soup.

Place the chicken carcass in a pot with peppercorns, bay leaf, onion, carrot and celery and cover with water.

2. Simmer gently for 30 to 40 minutes

Pick any remaining meat and set aside. Dispose of the carcass and the vegetables. Drain the stock and set aside.

3. Sauté the mirepoix.

In a large pot, heat the olive oil and saute the onion, celery and carrots. 

4. Add stock.
Add your stock and top up with purchased chicken stock to make up the required quantity.

5. When the vegetables are cooked, add a tablespoon of sofrito (or tomato paste) and the kale. About 5 minutes later, add the noodles.

6. Cook until both the kale and the noodles are almost tender (about 5 minutes more).

7. Dice the chicken meat and add it to the soup.

8. Add the pimentón and season with salt and pepper.

9. Heat for an additional 5 minutes.

10. Serve with grated parmesan.


If you liked this post, and would like to receive posts like it directly to your inbox, why not sign up for my email updates here.

Kale Salad with Candied Walnuts, Dates & Preserved Lemons

Our preserved lemons are done. And by done I mean ready. Back in January we made two beautiful batches. I was introduced to these a few years ago by Mourad Lahlou. I reviewed his cookbook and subsequently had the great pleasure to interview him as well. We talked about food's ability to bring people together and the role of food and memory, themes that seem to pop up all the time for me. 

Preserved Lemons. Helena McMurdo Photography on Endless Picnic.

Before this, I'd never eaten preserved lemons, let alone considered making them, but once I tried them, I was hooked and so was G. In fact, in our house, because he likes them so much, it's now G who takes charge of this process in early January when the citrus is beautiful and lovely. Basically the scrubbed, quartered lemons are packed with kosher salt. They are squeezed into a litre size jar and then topped with lemon juice. Then they sit to and you wait for the magic to happen. The rind becomes beautifully tender and packs a salty, lemony punch. If you have never made preserved lemons, I encourage you to consult Mourad's excellent book for more details about how to prepare them and give it a go.

Removing the rind from the flesh. Preserved Lemons. Helena McMurdo Photography on Endless Picnic.

Now that ours are done we've been digging into them in every possible way. I'm popping a slice of the rind in my gin and tonic, we're using them to top little anchovy toasts, (I prefer white anchovies in vinegar. G prefers the regular kind), and to make magical mouthwatering devilled eggs. 

Preserved Lemons. Helena McMurdo Photography on My Endless Picnic.

The subject of today's post is born out of a desire to put my preserved lemons to good use and to find yet another way to consume them, although, let's face it, I would be perfectly happy to eat the rinds straight out of the jar whilst watching television.

My inspiration comes from my friend Wendy, with whom I've shared many an interesting food conversation and who in her turn has convinced me to try an ingredient I already love in a new way. Kale. 

Kale. Helena McMurdo Photography on Endless Picnic.
Preserved Lemons. Helena McMurdo Photography on Endless Picnic.
Massaging the kale. Helena McMurdo Photography on Endless Picnic.

 I love Kale. I do. But up until recently I wasn't big on the raw version. I mean what's the point, when it tastes so good cooked with bacon or chorizo or in a hearty soup? But Wendy turned my head to the raw version when she introduced me to a fabulous kale salad that she featured last summer on her blog, The Garden Next Door, which is all about growing and eating your own produce. 

Since I found her salad I've made it in its original format and adapted it many times. And while I'm hardly going to go out and buy myself a kale smoothie, (sorry juicers - I don't get it), this salad has opened my eyes to a new way to enjoy kale. It's a salad that is extremely versatile with a nut component and a dried fruit component that can be easily switched out with other options. My desire to adapt it has very little to do with the quality of the original which is excellent but more to do with what might be in my cupboard at any given time. Wendy's original version calls for dates and almonds but I've used dried cranberries, raisins, pine nuts, walnuts and so on.

Honey Kissed Walnuts. Helena McMurdo Photography on Endless Picnic.

For today's version, I'm keeping the dates, substituting the lemon juice for the liquid from the preserved lemons and using a little more honey and a little more heat  than the original recipe, to counteract the salty punch of the lemons. Finally I'm adding a finishing touch of sweetness with the addition of honey-kissed walnuts.

I love to make this salad any time, but it's perfect for a pot-luck or party because so much of the preparation can be done the day before.

Kale Salad with Dates, Candied Walnuts & Preserved Lemons.
Preserved Lemons. Helena McMurdo Photography on Endless Picnic.

So that's the story of how we got to here, by sharing stories and learning from others, checking our cupboard stores and finding out what works. So with that in mind, I give you the following. 


Kale Salad with Dates, Candied Walnuts & Preserved Lemons

Kale Salad with Dates, Candied Walnuts & Preserved Lemons. Helena McMurdo Photography on Endless Picnic.

3 TBSP preserving liquid from preserved lemons
1 shallot, finely chopped
2 tsp honey (plus additional below)
1/2 tsp red pepper flakes
kosher salt to taste

2 bunches kale 
3 TBSP olive oil 
4 quarters preserved lemons, rind only

40 grams (1/2 cup) walnuts
1 TBSP honey
8 dates, pitted and chopped 
70 grams (1/2 cup) finely grated parmesan

1. Prepare the dressing.

In a small bowl, combine the preserving liquid, shallot, honey and the red pepper flakes. At this point, taste the liquid and if required, add additional kosher salt to taste. The preserving liquid is already quite salty so you may find you won't need any additional salt. Set the dressing aside.

2. Prepare the kale.

Begin by washing the kale and removing the central rib. Chop the kale into bite-size pieces and make sure it is well dried. Yes, I often chop the kale first and then spin it in a salad spinner to dry. It seems to be easier to handle this way. Now tip the kale into a large bowl along with the olive oil. Now massage it. Yes massage it. Now repeat. You can read all about what Wendy says about massaging and it's true. It helps to soften up the kale and makes it more palatable in its raw format.

3. Prepare the preserved lemons.

Separate the rind from each of the lemon quarters with a sharp knife. Discard the flesh of the lemon or set aside for another use. Slice the rind into thin strips or dice finely as you prefer.

4. Dress the salad and refrigerate.

Combine the kale, dressing and preserved lemons and refrigerate for at least one hour. Ideally make the salad to this point the day before you wish to serve and it will be beautifully flavourful and the kale will have softened up nicely by the time you are ready to eat it.

5. Prepare the nuts

Chop the nuts into small pieces, quarters should do it. In a dry, hot frying pan, stirring all the time so they do not burn, toast the walnuts until golden. Remove the pan from heat, add 1 generous  TBP honey and stir rapidly to coat while the pan is still hot.  Tip the nuts out on to a sheet of parchment and set aside to cool.  

6. Finish the salad.

Add the cooled walnuts, dates,and parmesan to salad and toss it gently until it all leaves are thoroughly coated.

Enjoy.  I hope you will try it and please let me know in the comments how it works for you or what other ingredients you would make this with.

Hope you are all having a lovely weekend.


If you liked this post and would like to read more like directly in your inbox, sign up here.


Chocolate Panettone Pudding

Those who live in my neighbourhood will know about a certain store. Every year around this time, the already cramped aisles of said store become nearly impossible to navigate due to what I like to call the Great Panettone Invasion. Hundreds of the boxes appear from one day to the next. No one sees them going in. All of a sudden they are there. Until I had moved to this neighbourhood, I didn't even know what a panettone was. But then suddenly there I was trying to fight my way through a mountain of them just to get a carton of milk.

 I asked an Italian friend of mine about them. "Very dry", she said.

"Actually we Italians joke about them. It's the traditional gift you bring to someone when you go to their house at Christmas, so the rumour has it that there is really only one panettone that just makes the rounds between the families".

Aha. That it explains why there are so many panettone in the store.

I tried one a few years ago, and I was inclined to agree with my friend's assessment. But since then I have come to conclusion that it has much to do with the quality of the item. I have since found others to be moist and delicious and I think I might love them. Like the one I bought last week and almost ate up as I was making this. 

Whether you like them or not, one thing I believe to be indisputable is the panettone's suitability for bread pudding. I made this and it was perfect.

Chocolate Panettone Pudding

1  750 gram panettone

100 to 125 grams good quality chocolate (in chunks or chips as you prefer)

950 ml milk

8 eggs

175 grams sugar

1 tsp vanilla or almond extract

Slice the panettone and arrange it in a shallow 9 x 9 baking dish. If the panettone is very fresh, you may want to leave it to dry overnight or let it dry in low oven. Sprinkle with chocolate chips or nestle pieces of  your favourite chocolate bar evenly throughout. (I use a Green and Blacks 70% Dark.) To make the custard, beat the eggs and milk together with a whisk or a fork.

Pour the custard over the mixture, allowing it to soak into the bread for about 15 minutes.  If you find it too dry, add an additional 1 egg and 3/4 cup milk and repeat until you are happy.

Sprinkle with granulated sugar.

Bake in a water bath a 325 oven for 50 minutes to 1 hour for a moist, gooey pudding. Serve warm with cream or as is. Eat the leftovers out of the fridge directly from the pan the next day. 


Mine's a Gin and Tonic

I like gin and tonic. I've been drinking it forever.  I drank my first not on a sunny patio overlooking the sea, or watching Wimbledon, but in a a nightclub called Luv-A-Fair and if you know Vancouver, I've already given away too much. I remember how the tonic glowed under the black lights but to be honest, at that time, it didn't stick. Later, when I lived in Ireland, I learned to drink gin and tonic properly with a group of fabulous girls who remain my friends today. There were two choices, Cork Dry Gin or Gordon's. We drank Gordon's until Bombay Sapphire came along. Yes, that pretty blue bottle turned our heads. Tonic came in little bottles on the side (as it should be) allowing us to mix our own. Lemon was standard issue in Ireland except for our favourite pub, whose proprietor bought limes just for a few of us girlfriends that preferred it thus. It helped that she was one of us. Good times were had by all.

Rosemary and Orange Zest Gin Tonic © 2014 Helena McMurdo

As I returned to Canada, so did my habit for Sapphire and Schweppes. At least at home. There was never any way of knowing what you were getting when you went out with that tonic in a gun stuff. Call me unpatriotic, but Canada Dry is not my favourite.

In my local, not many drink gin and tonic. Fancy cocktails come and go but I stick with my old lady drink. I've realized that others have noticed my devotion to this particular spirit. One of the fine barmen in my local puts it down in my place when he sees me at the door. Again, I've told you too much. Still it's nice to go where everybody knows your name, or at least your drink.

But my comforting G and T world was tipped upside down this summer on my trip to Spain.  "Cuál ginebra? Cuál tonic? Which gin? Which tonic?" asked the waiter as he handed me a list of no fewer than 12 choices of Gin.  Well,when in Spain, have a Spanish gin. Enter Gin Mare, Mediterranean Gin. Flavoured with traditional botanicals like juniper, coriander and cardamom, it also employs the less traditional in the form of Aberquina olives, thyme, rosemary and basil. This gives it an almost savoury backbone, but it's still most definitely a gin. That juniper flavour is there, just complemented and warmed up and I think it's my new favourite thing.

Gin Mare © 2014 Helena McMurdo

The other thing we noticed during our trip to Spain was a certain proclivity to garnish. In fact, considering the things they were putting into a G and T, I felt rather silly over my previous preoccupation over lemon or lime. Bars were laid out with little pinch bowls of coriander, peppercorns, juniper berries, cardamom pods, star anise and the rocks glass was eschewed for a huge goblet style. My Gin Mare came with juniper berries and a few lime twists.

Gin Mare © 2014 Helena McMurdo

While I can readily embrace the garnishes and I love the flavour they impart, the British side of my gin-and-tonic-loving personality cannot get on board with those big bulbous glasses. They just make me feel silly. Sorry, but gin and tonic is a serious drink and it requires a serious glass.

Rosemary and Orange Zest Gin Tonic Preparation © 2014 Helena McMurdo

Since this inculcation, I've started branching out with my Sapphire, introducing different tonics like Fever Tree or Fentimans although I wish Fentimans came in smaller bottles. And I'm noticing that the Spanish G and T craze is catching on here too. At Prontino on Cambie Street in Vancouver, they have an excellent selection of  interesting local and international gins and I can say that I've been there more than once to sample. 

But imagine my delight when my lovely fella came home with a bottle of the coveted Gin Mare and lovely delicious Fentimans tonic the other day. Some special garnishing seemed appropriate.

Rosemary and Orange Zest Gin Tonic Preparation © 2014 Helena McMurdo

With the fresh rosemary on my balcony, I had the perfect inspiration.

Rosemary and Orange Zest Gin Tonic Preparation © 2014 Helena McMurdo

Rosemary and Orange Gin Mare and Tonic

Add ice, orange zest and rosemary sprig to a rocks glass.

Pour 2 oz Gin Mare

Add Fentimans Tonic to Taste

I fear I may not be able to go back. 

Rosemary and Orange Zest Gin Tonic © 2014 Helena McMurdo

If you liked this post, and would like to receive posts like it directly to your inbox, why not sign up for my email updates here.

Custard & Crumble Plum Tart

The rain is here but there are still plums in the markets and this tart is a perfect way to say goodbye to summer and hello to the fall. The custard cooks into the tart and gives it a certain, shall we say, gooey-ness. This is based on a recipe from an old Martha Stewart book. My favourite thing about the original recipe was the almond flavour imparted by the almond extract. My version increases the amount of almond extract and doesn't use any vanilla extract. I use prune plums because I like the way the little sliced pieces look when I arrange them on the top of the tart, but  but larger ones will do.

Plum Custard Crumble Tart © 2014 Helena McMurdo
Pieces of Plum Custard Crumble Tart © 2014 Helena McMurdo

Custard & Crumble Plum Tart

Crust & Crumble Base

218 g sugar

1/4 tsp salt

114 g (4 oz) cold butter, cut into cubes

Mix and rub together the above ingredients until you have a coarse meal. Divide the mixture in half  (about 257 grams each half) and set aside. To the remaining half add the following:

3/4 tsp cinnamon

1/4 tsp baking powder

1 egg

Press the wet mixture into a 9 inch tart pan. Bake in 320 oven for 10 minutes, then remove from oven and let cool.

While the tart is baking, prepare the custard as follows:


Filling & Custard

1 1/2 lbs plums, sliced in half or in quarters

1 egg

125 ml whipping cream

56 g sugar

2 tsp almond extract

Additional sugar for sprinkling.

Arrange the plums in a pattern of your choosing on the surface of the cooled tart crust.

Combine the egg, cream, sugar and almond extract in a bowl and beat slightly with a fork or whisk. Pour over the plums. Sprinkle the crumb topping you set aside earlier over the plums. Sprinkle approximately 2 tsp sugar over that.  Bake in a 350 F oven for 30 minutes. Then turn on the broiler and watching carefully, brown the top .

(Use your judgement - I sometimes feel like the remaining topping is more than enough so I often freeze any remaining crumb topping. It's great to have on hand for those times when you need an instant dessert - Just sprinkle over some fruit and your are done!)


Apricot Sultana Chutney

I may have come slightly obsessed with canning. Boiling water, glass and hot metal would normally be associated with danger and fear but for some reason, when these elements are employed in the processes of preserving, I find it all very relaxing. There is something very rhythmic and orderly about preserving. Yet it is unpredictable at the same time. A transformation happens, as you cook down your preserve, and you wonder,

"What will this be like in a few months?"

What can I say? I'm hooked. When I troll the farmer's markets these days I'm looking for anything that I can stuff into a jar. When I saw these amazing apricots I began dreaming up something I could do with them.

Beautiful fresh apricots © 2014 Helena McMurdo

While apricot jam would be the obvious and assuredly delicious choice, to be honest, I'm not a huge jam consumer. (If we are talking marmalade, that's a different story).

In this instance, something more savoury appealed. G and I  had made a tomato relish earlier this month and I liked the process, and the results, so I thought a chutney might be more on track. I will look forward to eating this with a beef curry recipe I often make during the winter.

Fresh apricots in mason jar © 2014 Helena McMurdo

I found a recipe on Canadian Living that I liked the sounds of, but I fancied a slightly spicer version so I altered the spices a bit, increasing the cayenne pepper called for in their recipe and using turmeric and cloves along with the cinnamon and ground coriander.

Spice mixture and sultanas in Apricot Sultana Chutney © 2014 Helena McMurdo

The preparation couldn't be easier. The most difficult task is to chop the apricots. And that's not hard. Invite a friend to make this with you and you'll save yourself some work and have a fun time too.

Chopping apricots for Apricot Sultana Chutney © 2014 Helena McMurdo
Apricots and Sultanas ©2014 Helena McMurdo

The ingredients all get put into one pot and heated. C'est tout! After my chutney had cooked down, I tasted it and decided it still needed a little something. I liked the idea of adding some smoky flavour and even more spice so I added some Pimentón Picante (Spicy Smoked Paprika). That said, the flavour mellows out a lot, so there is just a touch of nice heat combined with the sweetness.

Making Apricot Sultana Chutney © 2014 Helena McMurdo

This chutney smells absolutely amazing while it cooks. After you bring the ingredients to the boil, you will have a lovely hour and half of beautiful, sweet, spicy fragrance filling up your kitchen.

Simmering Apricot Sultana Chutney © 2014 Helena McMurdo
Filling jars with Apricot Sultana  © 2014 Helena McMurdo

I made this about mid August, and yes I should have waited, but I've already tried some. And I'm liking it.  If I'm being completely honest, whenever I'm canning, I secretly hope that one or two jars won't seal during the water bath because then I'll get to pop them in the fridge and eat them sooner rather than later. I also like comparing how things change as time goes on. Hope you enjoy this.

Apricot Chutney 9 ©2014 HelenaMcMurdo

Apricot Raisin Chutney

1 kg (9 1/2 cups) fresh chopped apricots

165 grams (1 cup) red peppers

165 grams (1 cup) sultanas

130 grams (1 cup) chopped red onion 

416 grams sugar (2 cups)

2 tsp mustard seeds

1/2 tsp each of: 

cinnamon

ground coriander

salt

1/4 tsp each of:

cayenne pepper

turmeric

ground cloves

smoked paprika (optional)

This recipe makes  8 - 125ml jars which I feel is a good size for gifts or for use in a short time once opened. Chop the apricots and add to a large heavy bottomed pot with all of the other ingredients. Turn on the heat to high and bring the mixture to the boil. Once the mixture comes to the boil, reduce the heat and keep it simmering for about an hour until all the apricots have dissolved into the mixture and it is suitably thick. What is suitably thick? I say that is up to you, but if you want to get technical, use the chilled plate method to test the chutney. Spoon a small amount onto a chilled plate and let stand for a few seconds. Then tilt the plate and make sure the chutney runs slowly. The hour cooking time is a guideline only. Keep an eye on it and keep checking.  I ended up cooking mine down for and hour and a half. Once the chutney is done, it's time to can. Just before you are ready, put your lids in a pan of hot (not boiling) water and sterilize your jars in boiling water. (Have the water close to boiling beforehand so you can time everything just right). Remove the jars from the boiling water and set on a wooden board or a countertop covered with a cloth. (You want to avoid a hard surface that could damage the glass jars). While both the chutney and jars are still hot, fill the jars leaving 1 cm headspace. Wipe the edge of the jars with a clean cloth and place the lids on top, securing the bands to what is called fingertip tight. To do this. I place the index finger of my left hand in the centre of the lid and then with a light touch, secure the band with just my thumb and second finger. This will make the band, just tight enough, to allow the expansion that will happen during the water bath. With a set of canning tongs, lift the jars into a boiling water bath. The water must completely cover the jars. The water temperature will descent with the addition of the jars. Once the water has reached the boiling once again, leave the jars in the water bath for 15 minutes. Once the time has elapsed, remove the jars from the water to the wooden board. The lids should pop and curve down very quickly (2-3 minutes) indicating that the jars are sealed. Refrigerate any jars that do not seal and use within about 2 weeks.  Put the rest away and use them up within 6 months. 

Spring for Leek & Potato Soup

I can confirm that we are most definitely still experiencing what some have called Cool Spring here in Vancouver. 

Trailing Cherry Blossoms. Photo © 2014 Helena McMurdo

The first blossoms are coming out and the sun does poke its head out from the clouds, but there is still a chill in the air. I'm not ready to bare my legs just yet. In fact a cozy cowl neck  would suit me just fine. And to eat, I crave something warm and nourishing. This Leek and Potato soup is not revolutionary but it is simple and comforting and feels just right at this time of year.

Nourishing Leek & Potato Soup. Photo © 2014 Helena McMurdo

Leek & Potato Soup

4 potatoes (I used Yukon gold)

4 leeks (white and pale green parts only)

1 onion

500 ml chicken stock

salt & pepper to taste

Peel and dice potatoes. Coat with olive oil and roast in the oven until tender (10 to 20 minutes depending on your dice). In the meantime, finely chop an onion and sauté in olive oil on low to medium heat in a large saucepan. Clean the leeks thoroughly to remove any sand or dirt. Finely slice the leeks and and add to the onions. Sauté until soft and buttery. Add the potatoes and the chicken stock and simmer until all vegetables are soft. At this point remove from heat and cool slightly. Use a hand blender to purée the mixture. If you are eating the soup right away, add a little milk to taste and until you have a consistency that you like. If you would like to freeze the soup, I suggest omitting the milk. It can be added later on when you are ready to eat.

Enjoy. I'm sure Warm Spring cannot be far away.

Pancake Tuesday. Finally.

It's here. Pancake Tuesday. Only Christmas can garner more excitement from me than this day. When we were young, we started asking my mum and dad in February, "Is it Pancake Tuesday yet?" The reason: my mum's special crêpes. With my English Dad and my Spanish Mum, Pancake Tuesday became a hybrid holiday. The English tradition of eating pancakes on Shrove Tuesday, with my Mum's Galician Filloas.  Filloas are basically a crêpe, but an eggy crêpe, that is strong an delicate at the same time. Stacked in lacy layers, we sprinkled them with sugar, rolled them up and ate them until we could eat no more.

Filloas (Galician Crêpes) © 2014 Helena McMurdo

When we visited my grandma in Spain, we were impressed by her prowess with these crêpes. We wondered how she knew how to make these? Had my mum taught her? We watched as she greased the pan with an end of bacon, the grease clinging to the hot surface, and then ladled the perfect amount of batter into the pan and swirled it round coating the pan with the perfect crêpe. But here is where her technique diverged from that of my mum's. With the first side cooked, she would flip the crêpe out on the top of her flat top wood fired stove for the second side to cook. Naturally this allowed her to make them very quickly and for us to eat more! We also discovered that she didn't only make these on Pancake Tuesday, but would make them any time we asked. 

Filloas (Galician Crêpes) Mise en Place © 2014 Helena McMurdo
Batter for Filloas (Galician Crêpes) © 2014 Helena McMurdo.jpg
Cooking Filloas (Galician Crêpes) © 2014 Helena McMurdo.jpg
A Spoonful of Sugar © 2014 Helena McMurdo.jpg


I still love these like I did when I was a kid that is to say with sprinkled with sugar, rolled up and gobbled down but now that I'm a grown-up I am willing to try a squeeze of lemon as well and eat it with a knife and fork occasionally.

Stack of Filloas (Galician Crêpes) © 2014 Helena McMurdo.jpg
Filloas (Galician Crêpes), Detail © 2014 Helena McMurdo.jpg
Stack of Filloas (Galician Crêpes) with Lemon © 2014 Helena McMurdo.jpg

Filloas (Galician Crêpes)

6 eggs

500 ml milk

250 ml water

lemon zest

pinch of cinnamon

pinch of salt

250 grams flour

Beat the eggs and then add the other ingredients, mixing together until smooth. You can do this with a whisk or with a blender if you wish. 

Heat a cast iron or other non-stick pan and brush lightly with butter. (Unless you do happen to have an end of pancetta or bacon fat hanging around). Add just enough batter so that when you swirl it round in the hot pan it just covers the entire surface.  After approximately one minute, you should see that the surface of the crêpe will dry up and little bubbles will form. The edges of the crepe will also pull away from the sides of the pan. Time to flip! Be fearless and  insert a small off-set spatula underneath the crêpe and flip it quickly to cook the other side. Continue in this manner until you have a lovely stack. If you are eating them as you go, this will never happen. You can make these in advance and freeze them or stick them in the fridge and eat them the next day.  I am perfectly happy to eat them at room temperature but they can be easily warmed by flipping them quickly on a hot pan.

Garnish as you see fit. But please at least try them with nothing more than a  sprinkling of sugar.