The Nostalgia of Food

I mentioned a few weeks ago that I would be participating in the first public showing of my work as part of a group show called The Nostalgia of Food which opened on February 5th at Studio 126 in Vancouver's Chinatown. The show features a number of Vancouver food photographers, illustrators, and other artists all contemplating the theme of Nostalgia of Food. In total there are 15 artists showing more than 30 works, three of which I'm very pleased to say are by yours truly.

It was lovely to see such a great turnout for the opening night. I was truly overwhelmed by the great turnout  of Vancouverites that came out to support the show, on what was possibly one of the rainiest nights of the year. It was a night of  was good food, wine, conversation, friends, family and beautiful art from all the participants.

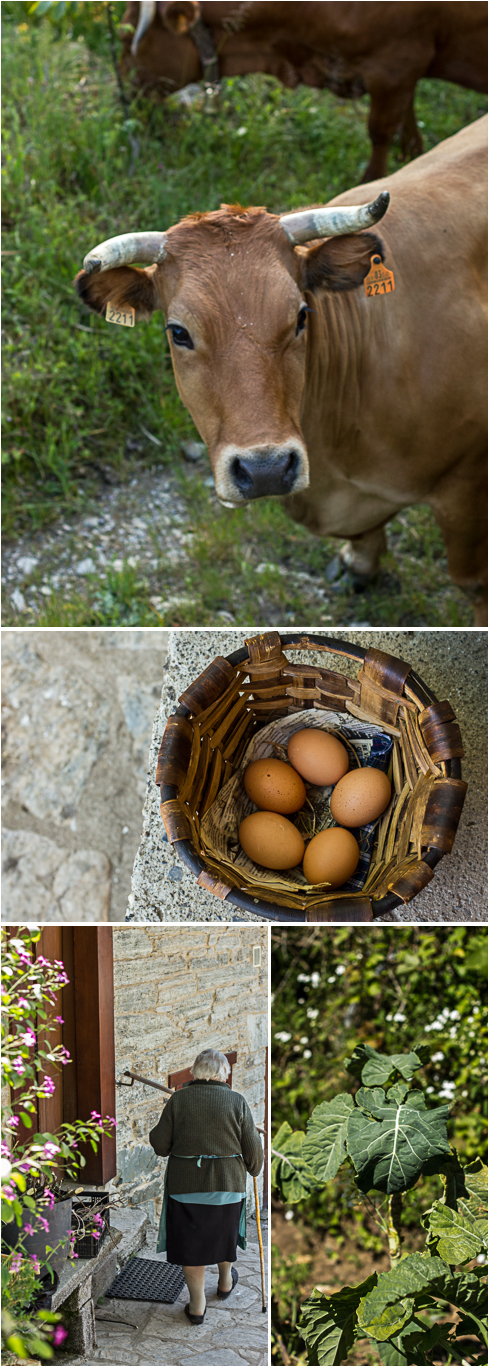
Naturally, the theme appealed to me. As readers of this blog will know, I do tend toward the nostalgic from time to time. It's sometimes said that nostalgia can hold us back and I'm very conscious of that but somehow I've found a way to make nostalgia drive me forward. Many of my own food memories are the subjects of this blog and they inspire both my writing and my photography work. In a way, I could say my own sense of nostalgia has opened up new avenues for me. I'm frequently surprised and delighted how often people respond to my posts with "my mum used to make that" or "that makes me remember".

I’m also interested by the cultural iconography of nostalgia as it relates to food. Does a home-made pickle made by a grandmother taste better than one made by a professional in a state-of-the art facility? Are we responding to the taste of the pickle or the experience or memory? How is that we can imagine these cues from experiences that may or may not have occurred. Are we being true to the real experience?  Or do we all attribute meaning to our memories that may not be there? No one in my family ever made pickles but I imagine them in an old-fashioned way. Why is that? 

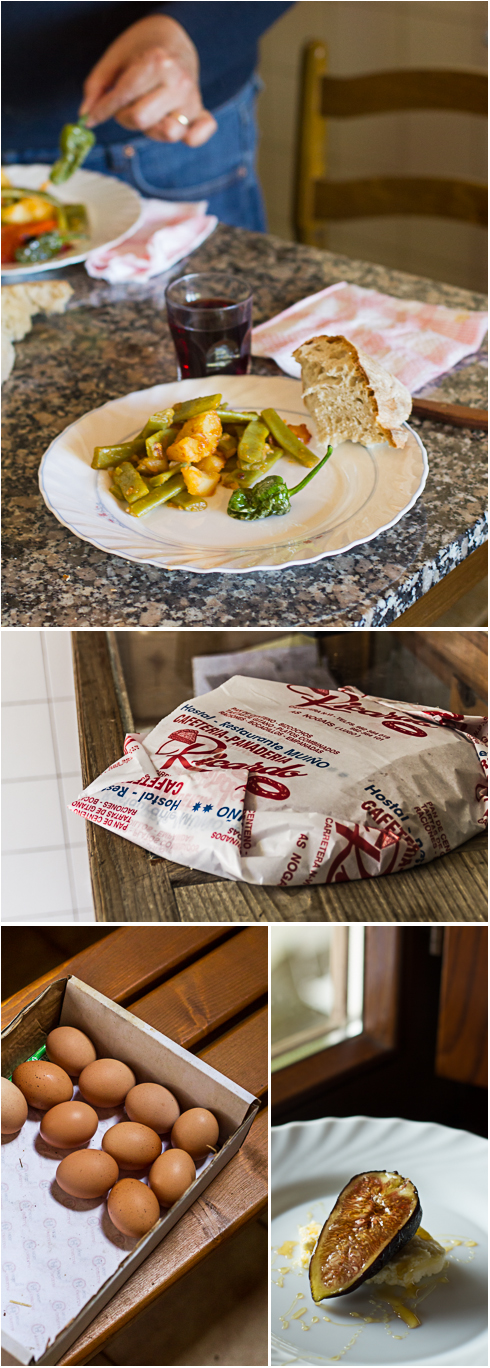
One of my works on display, shown above, is called Rashers and Eggs. With this piece as with much of my photography, I'm exploring the simplicity of these ingredients which recalls a simpler time, when these items were the product of the farmhouse, not the factory. How many of us have actual memories of eating this way? Or are we responding to a collective imagined experience? Why do we long for that simpler time? Is it because it is just that? Simpler.

The whole experience of showing was an interesting one, from selecting the works to be included, to determining how I wanted them to be framed or even if I wanted to frame them. In the end, I decided that as they were to be offered for sale, I wanted to offer them as I envisioned them being hung on the wall. Because my photographs are printed on a fine art paper with a lot of texture, I wanted the edge of the piece to be visible and so I decided to float them on a back matt. I really like this effect because it feels natural and in keeping with my work.

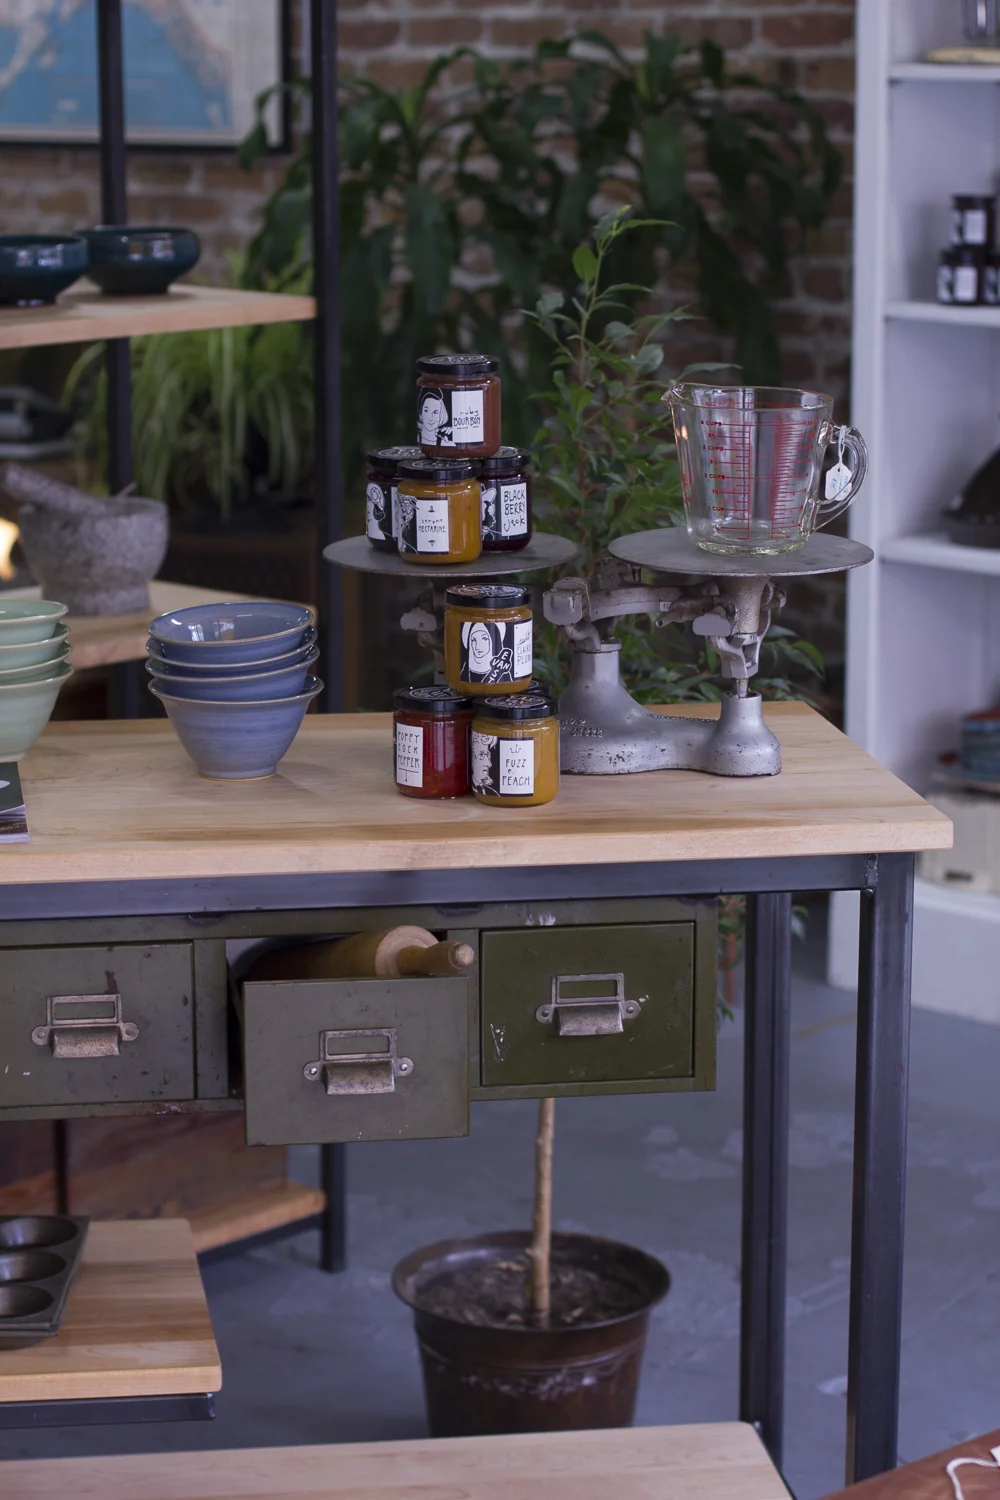
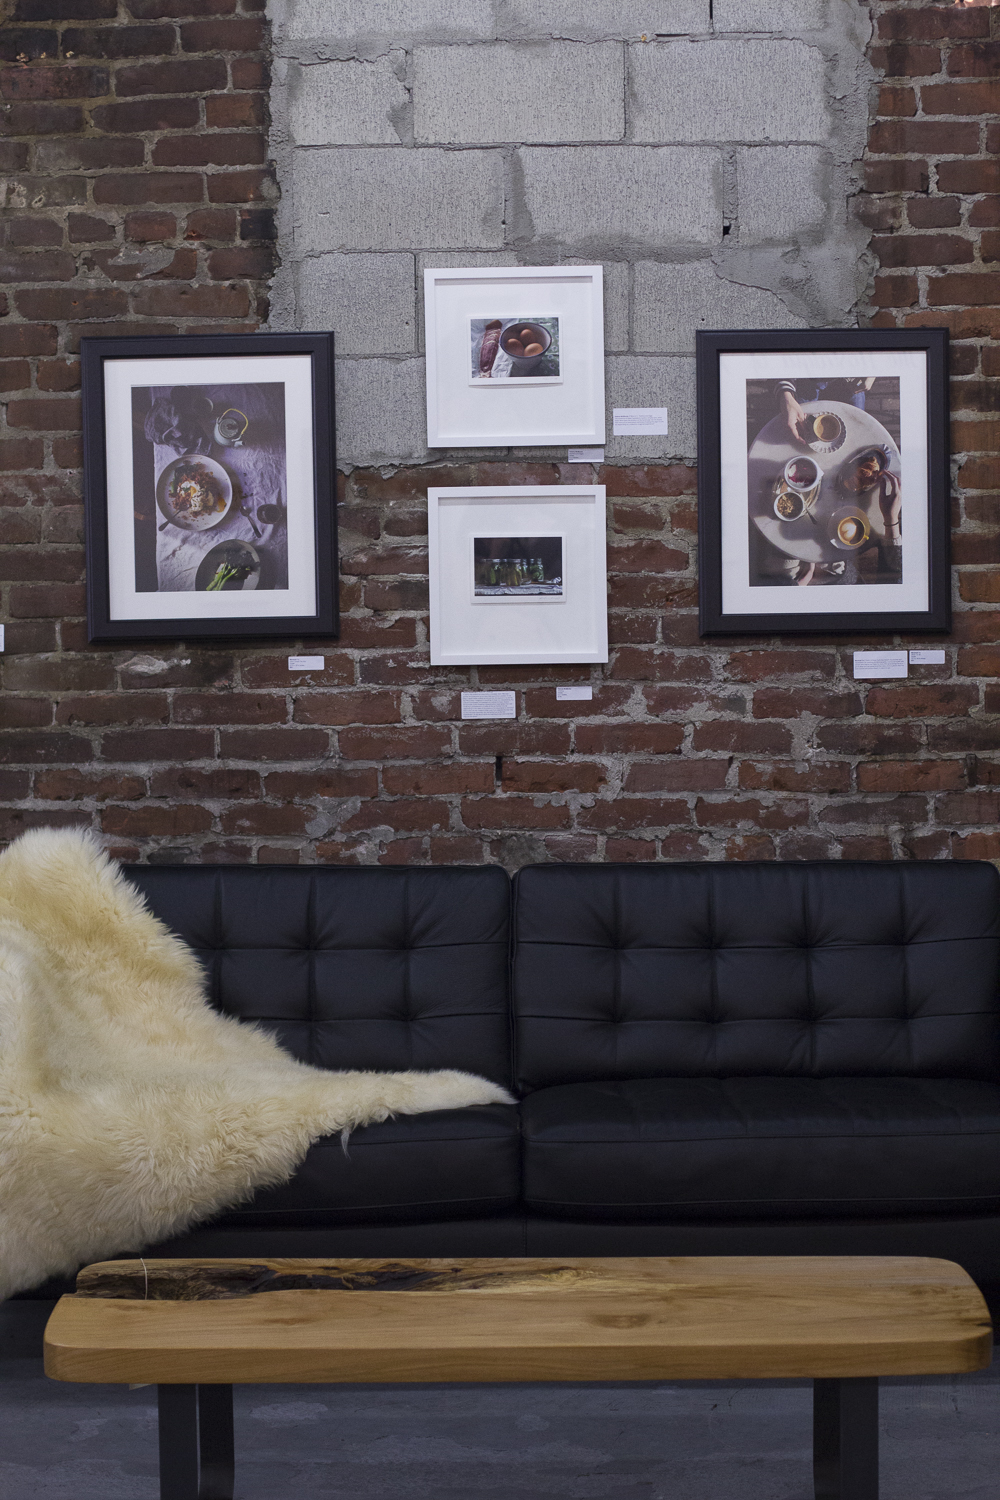
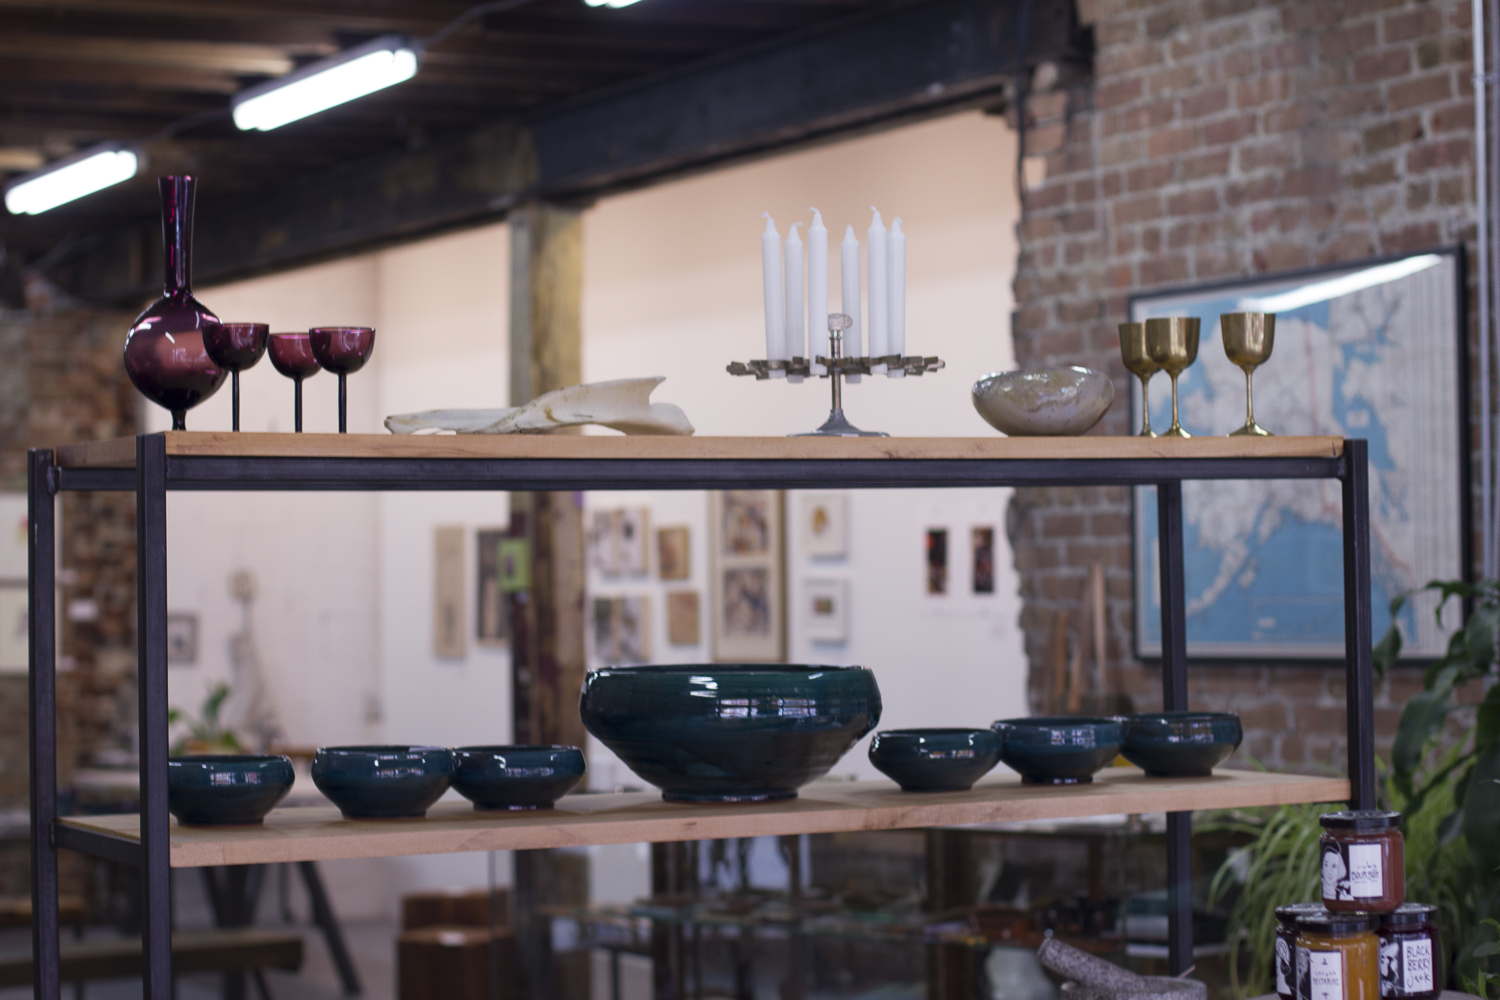
One of the best  parts  in this whole process was being introduced to Anna and Ryan at Studio 126. Not only do they promote local artists and artisans but they are also artisans themselves, making the most stunning furniture out of reclaimed wood and welded metal, which is also for sale in their shop. They have created a beautiful space to sell and show not only their own work but the work of others. Being in their space is a nostalgic experience in itself. The room is stripped to the bare bones highlighting the old exposed brick and steel beams and it makes me think of the secrets of history that live within those walls. It's a lovely place to stop in, say hi and just enjoy a quiet moment looking at beautiful things. 

So all in all, the experience has been a lovely one which in years to come I know I'll look back on with a new sense of nostalgia for that time when I put up work for my first art show.

The Nostalgia of Food runs until March 1st at Studio 126, 126 Pender Street, Vancouver

Opening Times: Wednesday - Saturday 12-6pm

There's also a series of workshops associated with the event involving pattern making with food and preserving. More details are available on the Studio 126 website.

In the meantime, I'd love to hear from you with your thoughts on nostalgia. Are there any foods or eating experiences that spark particular memories for you? Does nostalgia hold you back or drive you forward?


UPDATE: The show has concluded. If you are interested in purchasing one of my fine art prints, you can contact me helena@myendlesspicnic.com.


Happy Birthday South Granville Inhabiter

Last year around this time, I joined with two talented friends to start South Granville Inhabiter, a blog about living in our lovely Vancouver  neighbourhood of South Granville. This past week, we marked our one year anniversary, and you know me, I'm never one to pass up an excuse for cake.

Blueberry Victoria Sponge Birthday Cake © 2014 Helena McMurdo

In the next few weeks I'll be sharing some of my favourite images made for South Granville Inhabiter here on Endless Picnic, but for now, I'll revert to my usual subject matter and share the portraits of our birthday cake.

Blueberry Victoria Sponge Birthday Cake © 2014 Helena McMurdo

We chose a classic Victoria Sponge...well maybe not so classic. Rather than strawberry filling I used a mixture of blueberry jam and whole blueberries sandwiched with buttercream between two layers of sponge cake. I think the shot below is my favourite of the lot. It's so luscious and jammy.

Blueberry Jam and fresh blueberry filling for Victoria Sponge Birthday Cake © 2014 Helena McMurdo
Blueberry jam and  whole blueberry filling for Victoria Sponge Birthday Cake © 2014 Helena McMurdo

The finishing touch was provided by our logo dusted in sugar.  For that I had the able assistance of my South Granville Inhabiter colleague and talented illustrator Ženija Esmits who helped me by cutting out a fine template of the logo she had designed for the blog while I carefully went about the dusting.

Blueberry Victoria Sponge Birthday Cake dusted with South Granville Inhabiter Logo © 2014 Helena McMurdo
Blueberry Victoria Sponge Birthday Cake © 2014 Helena McMurdo

Almost too pretty to eat. Almost. 

Apricot Sultana Chutney

I may have come slightly obsessed with canning. Boiling water, glass and hot metal would normally be associated with danger and fear but for some reason, when these elements are employed in the processes of preserving, I find it all very relaxing. There is something very rhythmic and orderly about preserving. Yet it is unpredictable at the same time. A transformation happens, as you cook down your preserve, and you wonder,

"What will this be like in a few months?"

What can I say? I'm hooked. When I troll the farmer's markets these days I'm looking for anything that I can stuff into a jar. When I saw these amazing apricots I began dreaming up something I could do with them.

Beautiful fresh apricots © 2014 Helena McMurdo

While apricot jam would be the obvious and assuredly delicious choice, to be honest, I'm not a huge jam consumer. (If we are talking marmalade, that's a different story).

In this instance, something more savoury appealed. G and I  had made a tomato relish earlier this month and I liked the process, and the results, so I thought a chutney might be more on track. I will look forward to eating this with a beef curry recipe I often make during the winter.

Fresh apricots in mason jar © 2014 Helena McMurdo

I found a recipe on Canadian Living that I liked the sounds of, but I fancied a slightly spicer version so I altered the spices a bit, increasing the cayenne pepper called for in their recipe and using turmeric and cloves along with the cinnamon and ground coriander.

Spice mixture and sultanas in Apricot Sultana Chutney © 2014 Helena McMurdo

The preparation couldn't be easier. The most difficult task is to chop the apricots. And that's not hard. Invite a friend to make this with you and you'll save yourself some work and have a fun time too.

Chopping apricots for Apricot Sultana Chutney © 2014 Helena McMurdo
Apricots and Sultanas ©2014 Helena McMurdo

The ingredients all get put into one pot and heated. C'est tout! After my chutney had cooked down, I tasted it and decided it still needed a little something. I liked the idea of adding some smoky flavour and even more spice so I added some Pimentón Picante (Spicy Smoked Paprika). That said, the flavour mellows out a lot, so there is just a touch of nice heat combined with the sweetness.

Making Apricot Sultana Chutney © 2014 Helena McMurdo

This chutney smells absolutely amazing while it cooks. After you bring the ingredients to the boil, you will have a lovely hour and half of beautiful, sweet, spicy fragrance filling up your kitchen.

Simmering Apricot Sultana Chutney © 2014 Helena McMurdo
Filling jars with Apricot Sultana  © 2014 Helena McMurdo

I made this about mid August, and yes I should have waited, but I've already tried some. And I'm liking it.  If I'm being completely honest, whenever I'm canning, I secretly hope that one or two jars won't seal during the water bath because then I'll get to pop them in the fridge and eat them sooner rather than later. I also like comparing how things change as time goes on. Hope you enjoy this.

Apricot Chutney 9 ©2014 HelenaMcMurdo

Apricot Raisin Chutney

1 kg (9 1/2 cups) fresh chopped apricots

165 grams (1 cup) red peppers

165 grams (1 cup) sultanas

130 grams (1 cup) chopped red onion 

416 grams sugar (2 cups)

2 tsp mustard seeds

1/2 tsp each of: 

cinnamon

ground coriander

salt

1/4 tsp each of:

cayenne pepper

turmeric

ground cloves

smoked paprika (optional)

This recipe makes  8 - 125ml jars which I feel is a good size for gifts or for use in a short time once opened. Chop the apricots and add to a large heavy bottomed pot with all of the other ingredients. Turn on the heat to high and bring the mixture to the boil. Once the mixture comes to the boil, reduce the heat and keep it simmering for about an hour until all the apricots have dissolved into the mixture and it is suitably thick. What is suitably thick? I say that is up to you, but if you want to get technical, use the chilled plate method to test the chutney. Spoon a small amount onto a chilled plate and let stand for a few seconds. Then tilt the plate and make sure the chutney runs slowly. The hour cooking time is a guideline only. Keep an eye on it and keep checking.  I ended up cooking mine down for and hour and a half. Once the chutney is done, it's time to can. Just before you are ready, put your lids in a pan of hot (not boiling) water and sterilize your jars in boiling water. (Have the water close to boiling beforehand so you can time everything just right). Remove the jars from the boiling water and set on a wooden board or a countertop covered with a cloth. (You want to avoid a hard surface that could damage the glass jars). While both the chutney and jars are still hot, fill the jars leaving 1 cm headspace. Wipe the edge of the jars with a clean cloth and place the lids on top, securing the bands to what is called fingertip tight. To do this. I place the index finger of my left hand in the centre of the lid and then with a light touch, secure the band with just my thumb and second finger. This will make the band, just tight enough, to allow the expansion that will happen during the water bath. With a set of canning tongs, lift the jars into a boiling water bath. The water must completely cover the jars. The water temperature will descent with the addition of the jars. Once the water has reached the boiling once again, leave the jars in the water bath for 15 minutes. Once the time has elapsed, remove the jars from the water to the wooden board. The lids should pop and curve down very quickly (2-3 minutes) indicating that the jars are sealed. Refrigerate any jars that do not seal and use within about 2 weeks.  Put the rest away and use them up within 6 months. 

Spring for Leek & Potato Soup

I can confirm that we are most definitely still experiencing what some have called Cool Spring here in Vancouver. 

Trailing Cherry Blossoms. Photo © 2014 Helena McMurdo

The first blossoms are coming out and the sun does poke its head out from the clouds, but there is still a chill in the air. I'm not ready to bare my legs just yet. In fact a cozy cowl neck  would suit me just fine. And to eat, I crave something warm and nourishing. This Leek and Potato soup is not revolutionary but it is simple and comforting and feels just right at this time of year.

Nourishing Leek & Potato Soup. Photo © 2014 Helena McMurdo

Leek & Potato Soup

4 potatoes (I used Yukon gold)

4 leeks (white and pale green parts only)

1 onion

500 ml chicken stock

salt & pepper to taste

Peel and dice potatoes. Coat with olive oil and roast in the oven until tender (10 to 20 minutes depending on your dice). In the meantime, finely chop an onion and sauté in olive oil on low to medium heat in a large saucepan. Clean the leeks thoroughly to remove any sand or dirt. Finely slice the leeks and and add to the onions. Sauté until soft and buttery. Add the potatoes and the chicken stock and simmer until all vegetables are soft. At this point remove from heat and cool slightly. Use a hand blender to purée the mixture. If you are eating the soup right away, add a little milk to taste and until you have a consistency that you like. If you would like to freeze the soup, I suggest omitting the milk. It can be added later on when you are ready to eat.

Enjoy. I'm sure Warm Spring cannot be far away.

Out from the Fog

Misty Tree

Recently,  Vancouver was covered in a blanket of fog. It made me very nostalgic, reminded me of my time in Ireland. Here in Vancouver fog does happen, but not that often.

It stayed for about a week and so I enjoyed many early mornings in the still and calm. The thing that struck me most, was how quiet the city became. The fog seemed to suck all the noise of the city into its folds and hold it there breathless.

Image

One one morning when I was out at Vanier Park, the fog was moving quite a lot and the light was changing fast. I took this shot at about 8:45. I like how mysterious it is.

KitsilanoFog_© 2013 Helena McMurdo

By 5 minutes past nine, the fog burned off for just a brief moment and I shot this with just a peek of the city.

Kits Point©HelenaMcMurdo

Finally, the last few ones have been big ones for me as I finally launched my online food photography portfolio. It's been an interesting journey to work through the images and to decide what I would include. I think I've managed to put together a collection that best represents my food photography style. I hope you'll check it out.

I'm also working on a new look for this blog. When I started this blog 3 years ago, I didn't know where it would take me. It's been a very eye-opening journey and I've been fortunate through this blog to be led in paths I didn't even imagine. So now I feel the time is right for a bit of a revamp. I'll keep you updated and hope to reveal something soon.

All the best to you until then.

Client Work: Cloud 9 Specialty Bakery

I was very fortunate to have an opportunity to work with B3 Communications recently and to style and shoot some work for Cloud 9 Specialty Bakery. They are such fun to work with and we had a great collaboration. Cloud 9 Specialty Bakery is a local bakery specializing in gluten-free products. They have developed a special gluten-free baking mix which takes the hassle of making gluten-free treats at home. Used just like flour, it can be substituted cup for cup in any of your favourite recipes with really great results.

We wanted to capture the beauty and simplicity of the ingredient, so we selected a very simple tone-on-tone colour palette that reflected the contemporary sophistication of the brand while acknowledging it's traditional roots.

Here are my favourite images from the shoot of Cloud 9 Baking Mix and Cloud 9 Gluten-Free Bread.

Cloud9 SpecialtyBakery_©2013 Helena McMurdo.jpg

If you are interested in gluten-free baking please check out Cloud 9 Specialty Bakery.

If you are interested in my food styling and photographic work and would like to know more about working with me, please don't hesitate to get in touch at helena@myendlesspicnic.com

Blueberry Apricot Custard Crumble Tarts

BlueberryApricotTarts©2013HelenaMcMurdo.jpg

So I'm sitting here writing this and there is literally sweat pouring down my temples and I'm wondering who in their right mind would attempt to bake anything on a day such as this. I arose early and was actually glad to see a cloudy sky thinking...ahhh some coolness.  This combined with an unexpected and very welcome gift of local blueberries on Friday night and the presence of a couple of apricots on my counter which in the words of my mother 'needed eating' sparked the idea.  Add to this the fact that I knew that way back, in the depths of my freezer,  were two beautiful previously prepped tart shells and we now had the perfect storm of conditions for my baking madness. So the oven was already preheating by the time I realized this was not going to be the cool day I had imagined. Oh well suck it up. I love it when conditions and and ingredients spring up to magically provide a recipe so here's what I came up with. Blueberry and Apricot Custard Crumble Tarts. A mouthful, you say? Yes it is. And you will like it.

I recently made a lovely lemon tart using a pâte sablée from one of my favourite books Classic Artisan Baking by Julian Day. This has become my new very favourite pastry. It is rich and buttery and almondy and well, it's just perfect. And it freezes very well so when I had some leftovers I immediately pressed them into two tart shells for future use and popped them in the freezer...where I found them today.

The other gift that allowed this to happen today was a crumble mixture that I also keep on standby in the freezer. I inevitably have too much of it whenever I make it and the first time this happened I froze it. It happened by accident the first time but the results were so good that I admit that now I make it in advance and always have some on stand by. I mean who knows when you could be called upon to provide a crumble at a moment's notice.  Don't say I didn't warn you.

Finally, this dessert makes use of a custard filling which I think is one of the loveliest parts of this dessert. It gives it a kind of bread-puddingy-ness (Yes, of course it's a word).

Blueberry Apricot Custard Crumble Tarts

For 4 tarts you will need:

Pastry

4  (4 inch) tart shells lined with your favourite pastry. I used pâte sablée from Classic Artisan Baking.  Before discovering this pastry I had no qualms of buying store-bought pastry (shock-horror!)  from people who were far better at pastry making than I was.  I like a sablée pastry for the almond flour which gives it such a richness.

You will need to follow the directions for your pastry and blind bake it. Usually this involves covering the shells with parchment or foil  and filling with baking beans before baking for about 15-20 minutes. (Depending on your pastry). Remove the beans and parchment and bake for another 5 minutes or so to slightly brown the pastry.  Remove from the oven and set aside to cool.

Custard Filling

1 egg

1/4 cup / 6o ml whipping cream

1 TBSP sugar

pinch of cinnamon

dash of vanilla or almond extract

Lightly beat the egg, add the cream and other ingredients, whisk and then set aside until needed.

Crumb Topping 

(makes more than enough to save for later)

1 cup / 227 grams sugar

1/4 tsp salt

1/4 lb / 113 grams cold butter

1/4 cups / 156 grams all-purpose flour

Combine first three ingredients cutting in the butter until the mixture resembles a coarse meal. Add the flour and rub together with your fingertips until the mixture has the texture of fine breadcrumbs.  Set aside until ready to use. Freeze what you don't use to for the crumbles of your future. (Just top your fruit with the mixture and you are good to go).

Fruit Filling

about 1  cup of blueberries

3 apricots, sliced

To assemble:

Once cool, fill the tart shells with a single layer of blueberries, then arrange the apricots on top to your liking. I used 5 apricot slices per tart but you could use more. Then fill in the holes/gaps with more blueberries.  Depending on how sweet your fruit is, you may want to sprinkle some sugar on the fruit at this stage. Taste it and make a call. Now pour the custard mixture over the tarts until the level of custard is just shy of the top of the pastry case. (Stir the custard before pouring as it may have settled). Finally sprinkle some of the crumble mixture on top. Really this part is up to you depending on how much crumble you prefer but I used about 2 TBSP per tart.

Bake at 350 until the crumb topping is golden brown and the custard and fruit juices are bubbling up through the top of the crumb.

Eat and enjoy while mopping the sweat from your brow and thinking how very clever you are!

Inspiration: Peas and Ham

Image

Image

So all this revisiting of my recent trip has given me a craving for some simple Spanish cooking here at home in Vancouver. I was at Granville Island yesterday and spotted some lovely English Peas and thought - peas and ham. And by ham, I mean Serrano. Claro. I can always count on Oyama Sausage Company for some of the good stuff.

There is something so simple and  satisfying about this dish. Fresh peas are boiled and then tossed with bits of ham in a sauce of nothing more than olive oil, pimentón and garlic. A bit of bread to mop of the smoky, scented oil and a glass of wine and you've got something truly delicious.

You will need:

About 3 Cups fresh, shelled English peas

100 grams Jamón Serrano cut into little bits (like lardons) (I bought these pre-cut from Oyama Sausage Company which saved me lots of time).

3-4 TBSP Olive Oil or more

2 Garlic Cloves, flattened and blistered with the back of a knife

Approx 1 TBSP Hot Smoked Paprika (Pimentón Picante)

Ok. So now we have to talk about Pimentón. You may or may not know that there are three types of Smoked Paprika from Spain: Dulce (Sweet), Agridulce (Bittersweet) and Picante (Hot). Where I live in Vancouver, I find it is more often the Dulce or Agridulce varieties that are on shelves. Picante can be hard to find but it is my preference in this recipe. In our family, this item is something that tucked into a Christmas stocking, can make someone very happy. So grab it when you see it.

The method is simple.

Boil the shelled peas until they are tender. How long? I have no idea. Keep tasting them until they taste good to you.

In the meantime, heat the olive oil and fry the garlic and ham very gently, just browning the ham. When the ham is done, remove it and let it drain on some paper towel (or not). Keep frying the garlic, pressing on it with a back of a spoon to mush it up. The purpose here is simply to flavour the oil. You will actually remove the garlic when serving. I know it can seem like a lot of oil. It is. But most of it is going to settle to the bottom of the dish and you are going to mop it up with your bread. You'd eat as much when you dip your bread in oil at an Italian restaurant and you wouldn't even think about it.

Just before the peas are about to be ready, remove the pan with the oil from the heat, remove the garlic and add the pimentón. The pimentón will fry very vast in the hot oil so keep stirring constantly. Quite quickly the oil will cool. At this point, you can set the pan aside. Now the peas will be done. Drain them and combine with the pimentón oil mixture. Easy peasy. Did I just say that? Oh boy.

PeasandHam2 ©2013 Helena McMurdo.jpg

So there you have it. I hope you will try this with some fresh local peas. Let me know how it goes. I would love to know.

Pulpo a Feira

Pulpo©2013HelenaMcMurdo.jpg

One of the classic items to eat in Galicia is Pulpo do Feira. Translation: Octopus-"Market Style". In my grandmother's local market, the women working the Pulpo tent dip their sticks rhythmically into the huge copper pot, their hands seemingly immune to the scalding water below. Then using scissors, they snip the legs into pieces so quickly it's amazing that any of them still have fingers. You take your seat in the covered tent and someone plunks down a bottle of wine and a huge loaf of bread and you order your ration. It's drizzled with olive oil,  and sprinkled with salt and pimentón. Y ya está. (That's it!) Meaty deliciousness.

Galicia: Te gusta?

I'm back from a recent trip to Galicia and I wanted to share some of the images I made as well as some of the memories I have from this place. As many of you know, I was born in Spain or more specifically - as my relatives remind me often - in Galicia. Which is different. When we were kids, we visited in the summers from our home in the North of Canada. The differences were dramatic. In Yellowknife, the Frozen North, the chickens came wrapped in plastic on meat trays in the YK Super A, the local grocery store. In Galicia hens strolled around the yard of my grandparents house and baby chicks were gifts from my Abuelo (grandfather) to me and my two sisters when he came back from the local market. Today in North America we would call it a 'Farmer's' Market. In Galicia, then as now, no one felt the need to specify this obvious detail. We were disappointed to learn that grandma's chickens laid no more than one egg a day and sometimes not even any. This did not seem to tally with the pictures in our kindergarden schoolbooks of mother hen sitting on a mountain of eggs. Our relatives viewed us as city slickers (clearly not the case as anyone who has been to Yellowknife can attest), but our words and actions revealed that we ignorant of country ways. They  laughed when my sister tried hopelessly to shake a chicken in order to induce an increase in egg production.

Big excitement happened when one of the neighbours would move cows from one field to another yelling; Vaca Ve!  My sisters and I would copy them, grabbing a stick and yelling the refrain, not really understanding the words but getting the message.  Today there are fewer cows in the village. But they still move back and forth in a rhythm that marks the days. Today they wear ear tags and in the words of one of the neighbours, "they have more paperwork than we do".

Galicia Village Textures © 2013 Helena McMurdo

When we were kids, my grandparents ran a little bar come shop and their little corner of the world seemed a bustling place with neighbours dropping by to have a drink, a slice of jamón or to buy some basic essential like shampoo or the famous black soap from LaToja.

We found it all so very amusing, helping to serve the drinks and being paid in chocolate and Chupa Chups. Much of our time was spent being poked by neighbours and relatives who spoke freely with their pronouncements as to which of us was the fattest, skinniest, best looking, tallest, most intelligent etc. “The food must be very bad in Canada. The children are so skinny” The bar is  no more but the neighbours still have a lot to say. Now they tell me I am fatter but in a good way. “Estás bien ahora.”

On of the first spanish phrases I remember learning was 'Te gusta?'" Do you like it? Someone was always offering food. (What is a local custom became even more impressive presumably because of our perceived state of malnutrition.) Most of the things being offered to eat were too simply too scary for our young and picky palates to consider. Squid? Octopus? No thank you. "No me gusta". We seemed happy to exist on a diet of Fanta de Naranja, Maria Biscuits and Cola Cao with the odd tortilla francesa (omelette) thrown in. But I do remember always liking jamón and chorizo.

Today, I’m making up for my prior fussiness. In fact, there seems to be little that I don’t like. This is simple food; Green Beans with Garlic and Smoked Paprika, Kale with chorizo and a perfect farm fresh egg, a slice of empanada made in the local panadería. Octopus is boiled and sprinkled with salt and paprika and served with boiled potatoes.

Food in Galicia_©2013 Helena McMurdo

The cooking is not complicated. The ingredients are what make it. And nature provides. Y si me gusta!

Brown Bread & Nostalgia

©2012HelenaMcMurdo_Irish_details.jpg

The Irish are always accused of being overly nostalgic and maybe this affects all who visit there. It's cold and wet now in Vancouver. This time of year always reminds me of my time in Ireland. Not that the sun never shone when I was there. It definitely did. But when I moved there in mid-September 1995, I soon found myself in the middle of a dark, wet and windy October. I'm shooting Irish Brown Bread at the moment, the perfect antidote to cold and windy weather. I can't help think of that time, and of  the landscape, the people and the magic that inhabits the place. Here's a few detail shots from my current shoot.