Mine's a Gin and Tonic

I like gin and tonic. I've been drinking it forever.  I drank my first not on a sunny patio overlooking the sea, or watching Wimbledon, but in a a nightclub called Luv-A-Fair and if you know Vancouver, I've already given away too much. I remember how the tonic glowed under the black lights but to be honest, at that time, it didn't stick. Later, when I lived in Ireland, I learned to drink gin and tonic properly with a group of fabulous girls who remain my friends today. There were two choices, Cork Dry Gin or Gordon's. We drank Gordon's until Bombay Sapphire came along. Yes, that pretty blue bottle turned our heads. Tonic came in little bottles on the side (as it should be) allowing us to mix our own. Lemon was standard issue in Ireland except for our favourite pub, whose proprietor bought limes just for a few of us girlfriends that preferred it thus. It helped that she was one of us. Good times were had by all.

Rosemary and Orange Zest Gin Tonic © 2014 Helena McMurdo

As I returned to Canada, so did my habit for Sapphire and Schweppes. At least at home. There was never any way of knowing what you were getting when you went out with that tonic in a gun stuff. Call me unpatriotic, but Canada Dry is not my favourite.

In my local, not many drink gin and tonic. Fancy cocktails come and go but I stick with my old lady drink. I've realized that others have noticed my devotion to this particular spirit. One of the fine barmen in my local puts it down in my place when he sees me at the door. Again, I've told you too much. Still it's nice to go where everybody knows your name, or at least your drink.

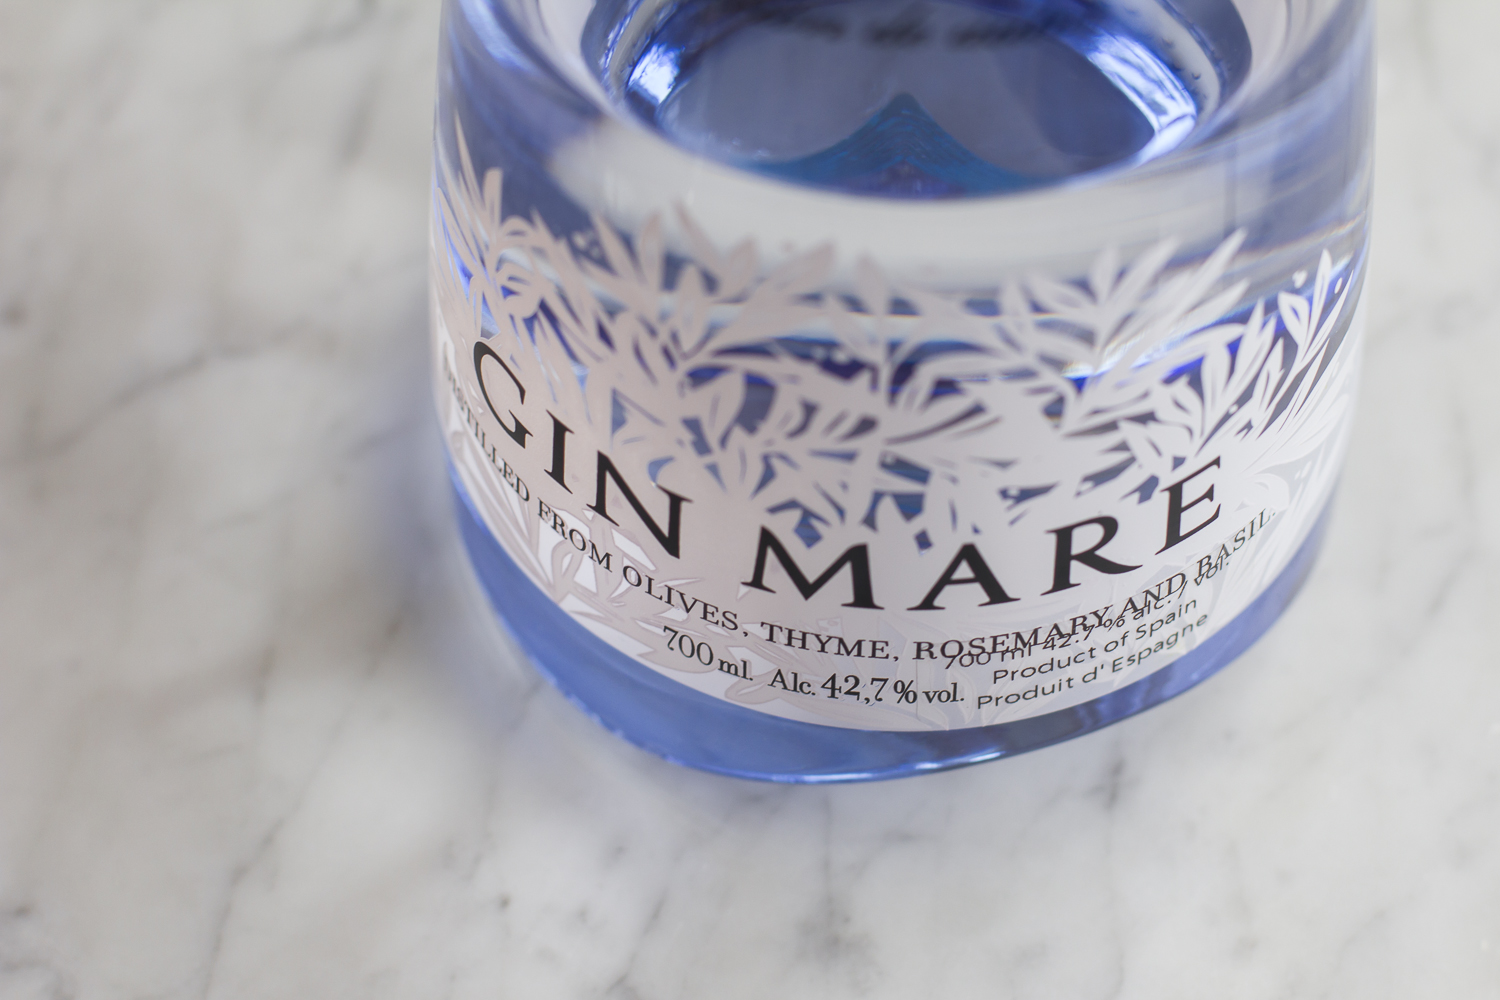
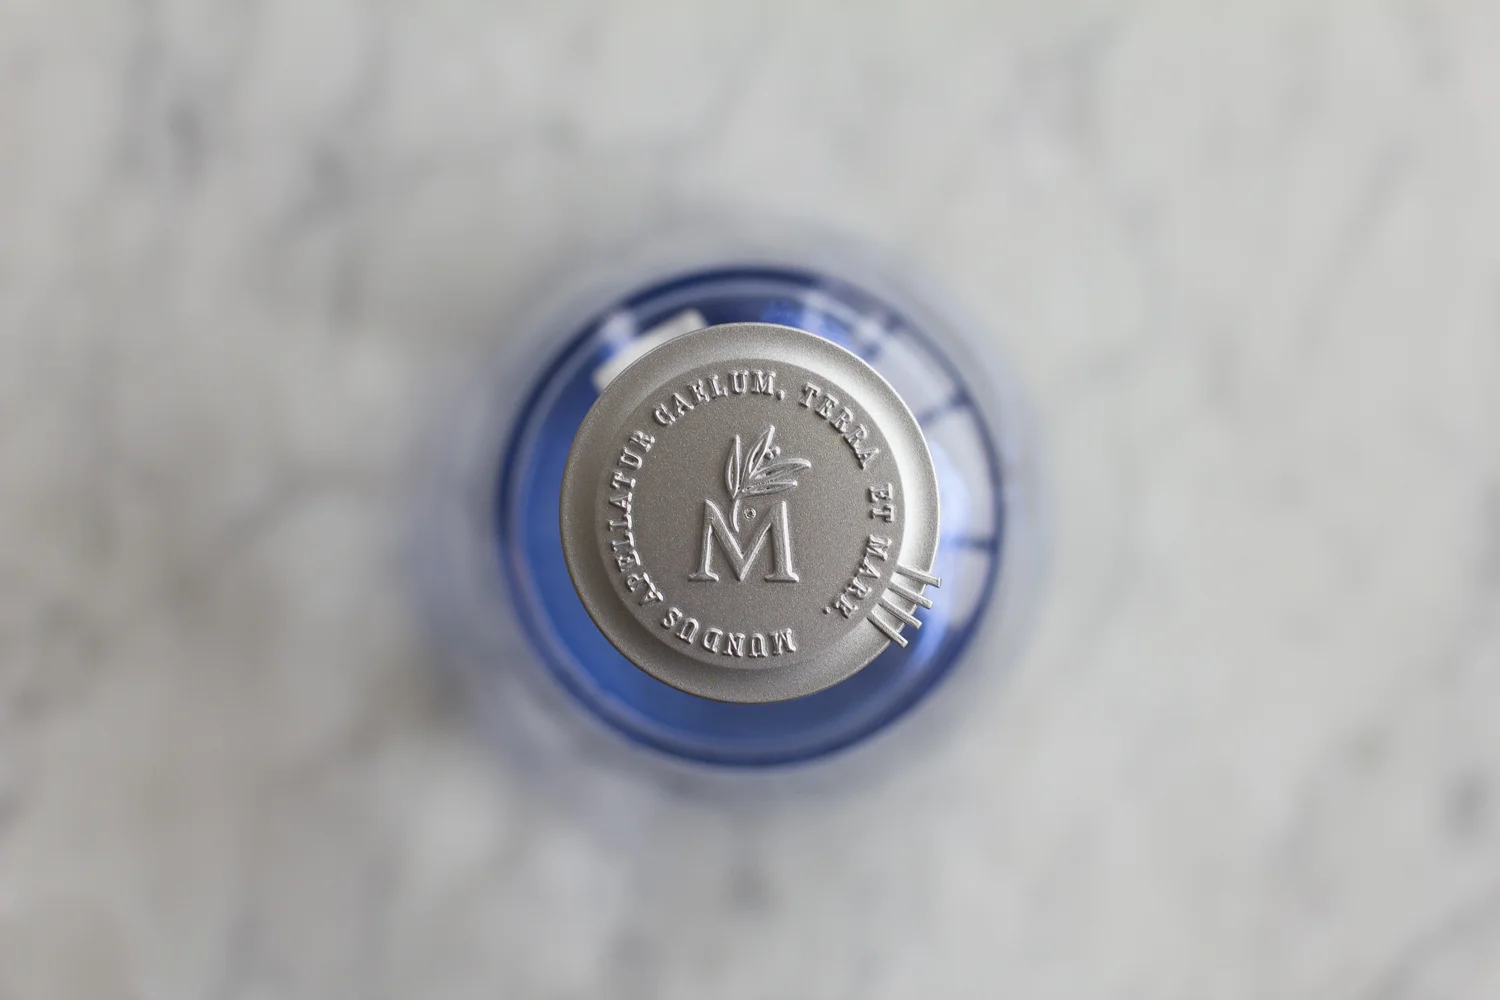
But my comforting G and T world was tipped upside down this summer on my trip to Spain.  "Cuál ginebra? Cuál tonic? Which gin? Which tonic?" asked the waiter as he handed me a list of no fewer than 12 choices of Gin.  Well,when in Spain, have a Spanish gin. Enter Gin Mare, Mediterranean Gin. Flavoured with traditional botanicals like juniper, coriander and cardamom, it also employs the less traditional in the form of Aberquina olives, thyme, rosemary and basil. This gives it an almost savoury backbone, but it's still most definitely a gin. That juniper flavour is there, just complemented and warmed up and I think it's my new favourite thing.

Gin Mare © 2014 Helena McMurdo

The other thing we noticed during our trip to Spain was a certain proclivity to garnish. In fact, considering the things they were putting into a G and T, I felt rather silly over my previous preoccupation over lemon or lime. Bars were laid out with little pinch bowls of coriander, peppercorns, juniper berries, cardamom pods, star anise and the rocks glass was eschewed for a huge goblet style. My Gin Mare came with juniper berries and a few lime twists.

Gin Mare © 2014 Helena McMurdo

While I can readily embrace the garnishes and I love the flavour they impart, the British side of my gin-and-tonic-loving personality cannot get on board with those big bulbous glasses. They just make me feel silly. Sorry, but gin and tonic is a serious drink and it requires a serious glass.

Rosemary and Orange Zest Gin Tonic Preparation © 2014 Helena McMurdo

Since this inculcation, I've started branching out with my Sapphire, introducing different tonics like Fever Tree or Fentimans although I wish Fentimans came in smaller bottles. And I'm noticing that the Spanish G and T craze is catching on here too. At Prontino on Cambie Street in Vancouver, they have an excellent selection of  interesting local and international gins and I can say that I've been there more than once to sample. 

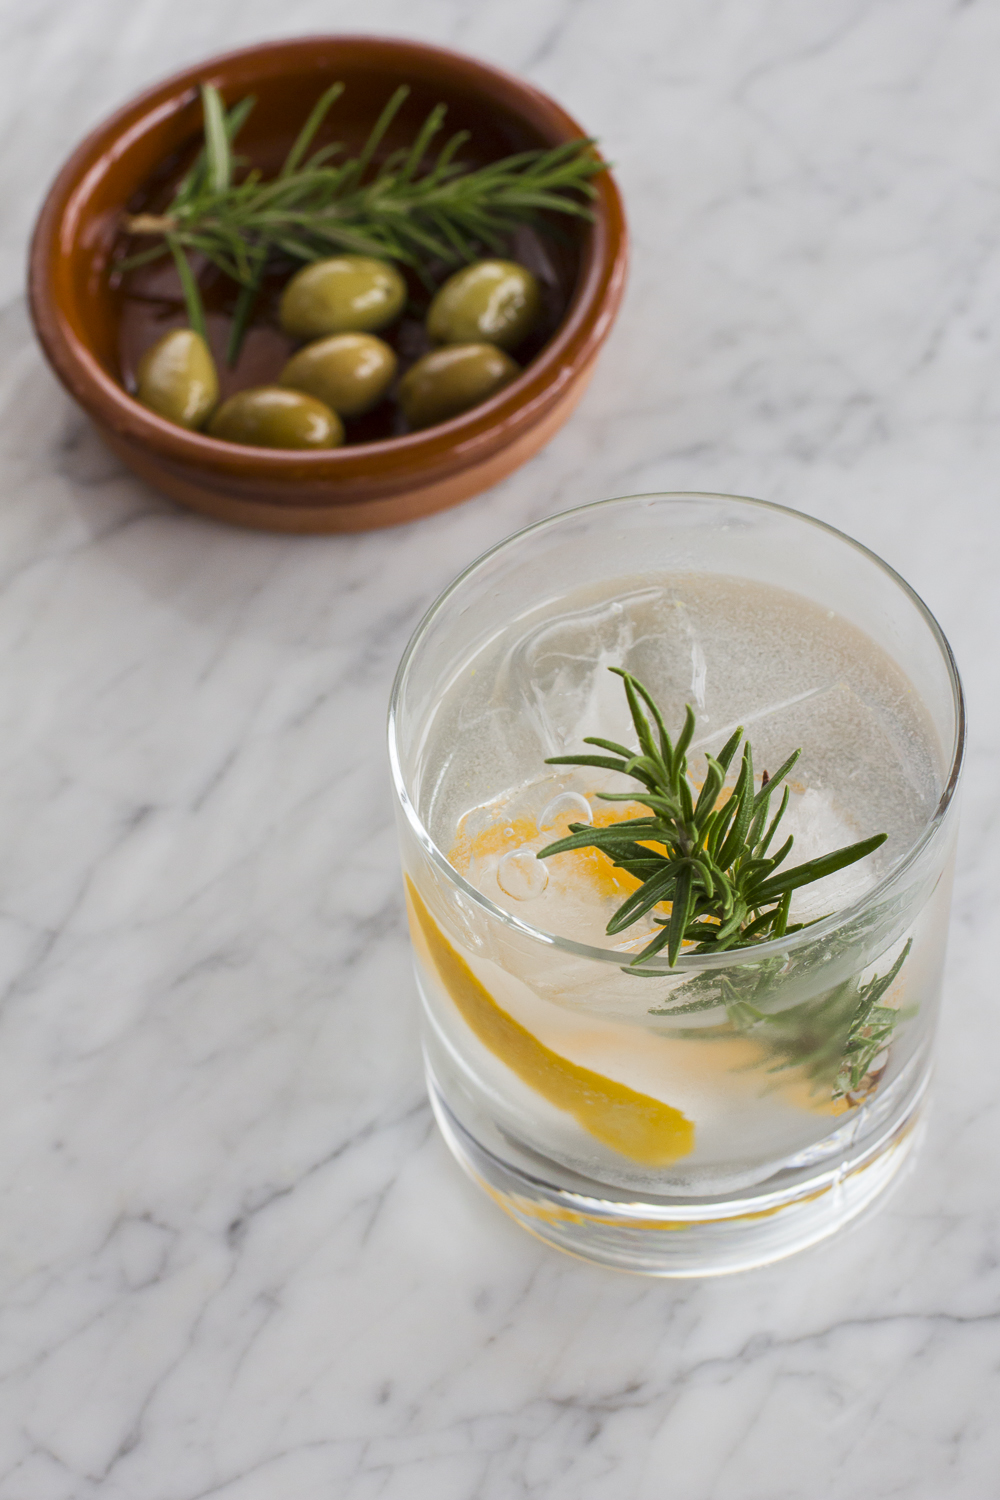
But imagine my delight when my lovely fella came home with a bottle of the coveted Gin Mare and lovely delicious Fentimans tonic the other day. Some special garnishing seemed appropriate.

Rosemary and Orange Zest Gin Tonic Preparation © 2014 Helena McMurdo

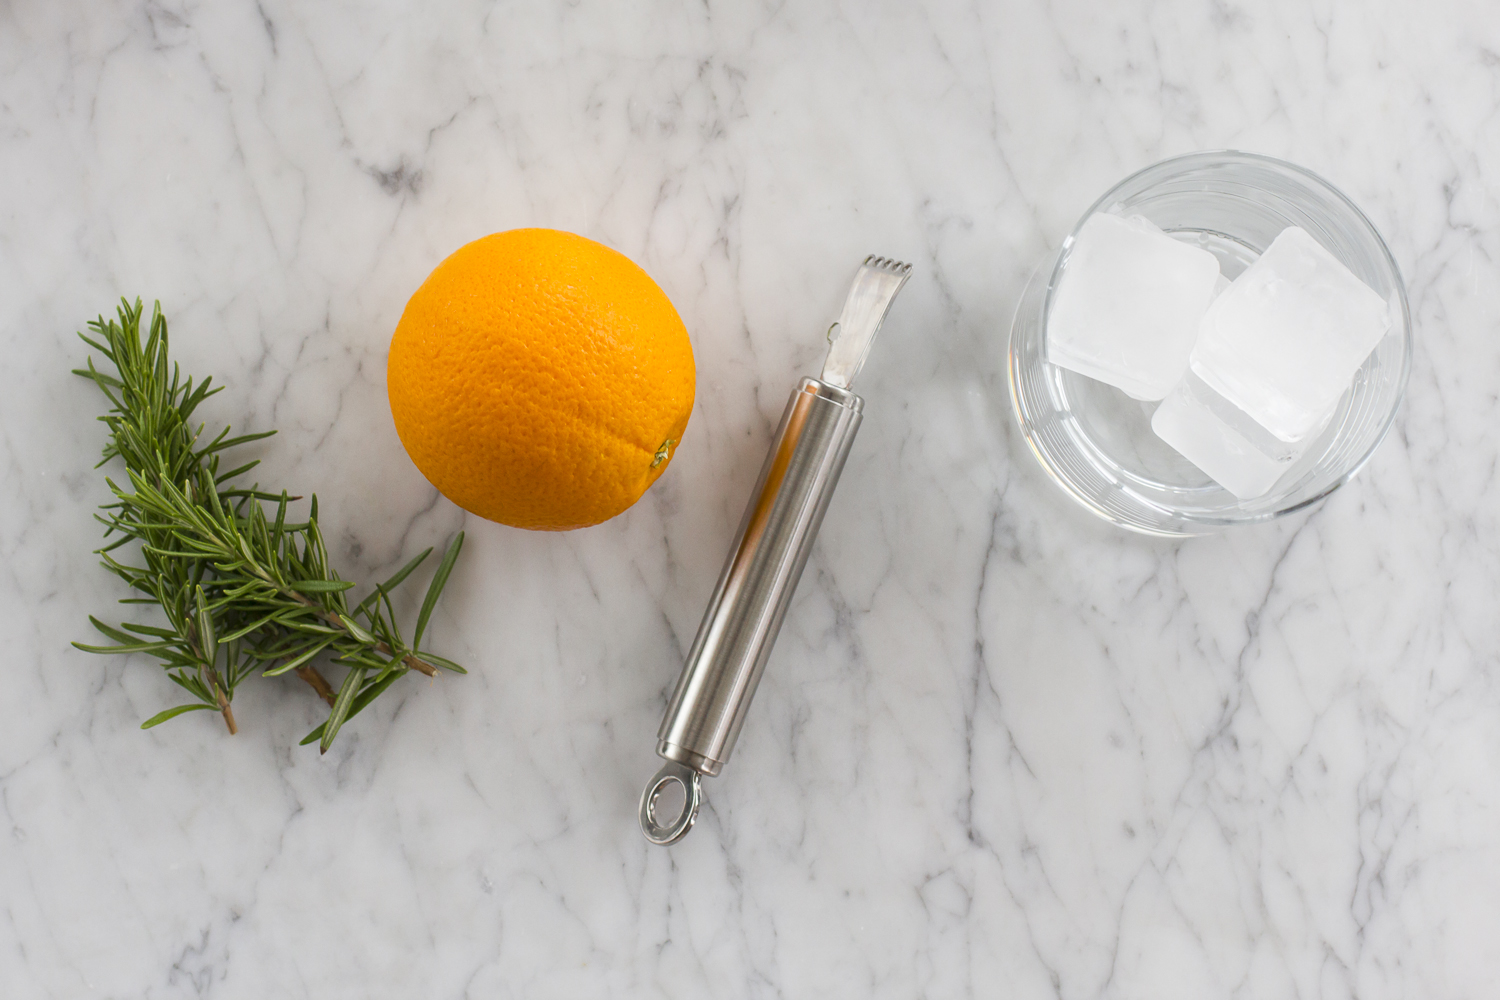
With the fresh rosemary on my balcony, I had the perfect inspiration.

Rosemary and Orange Zest Gin Tonic Preparation © 2014 Helena McMurdo

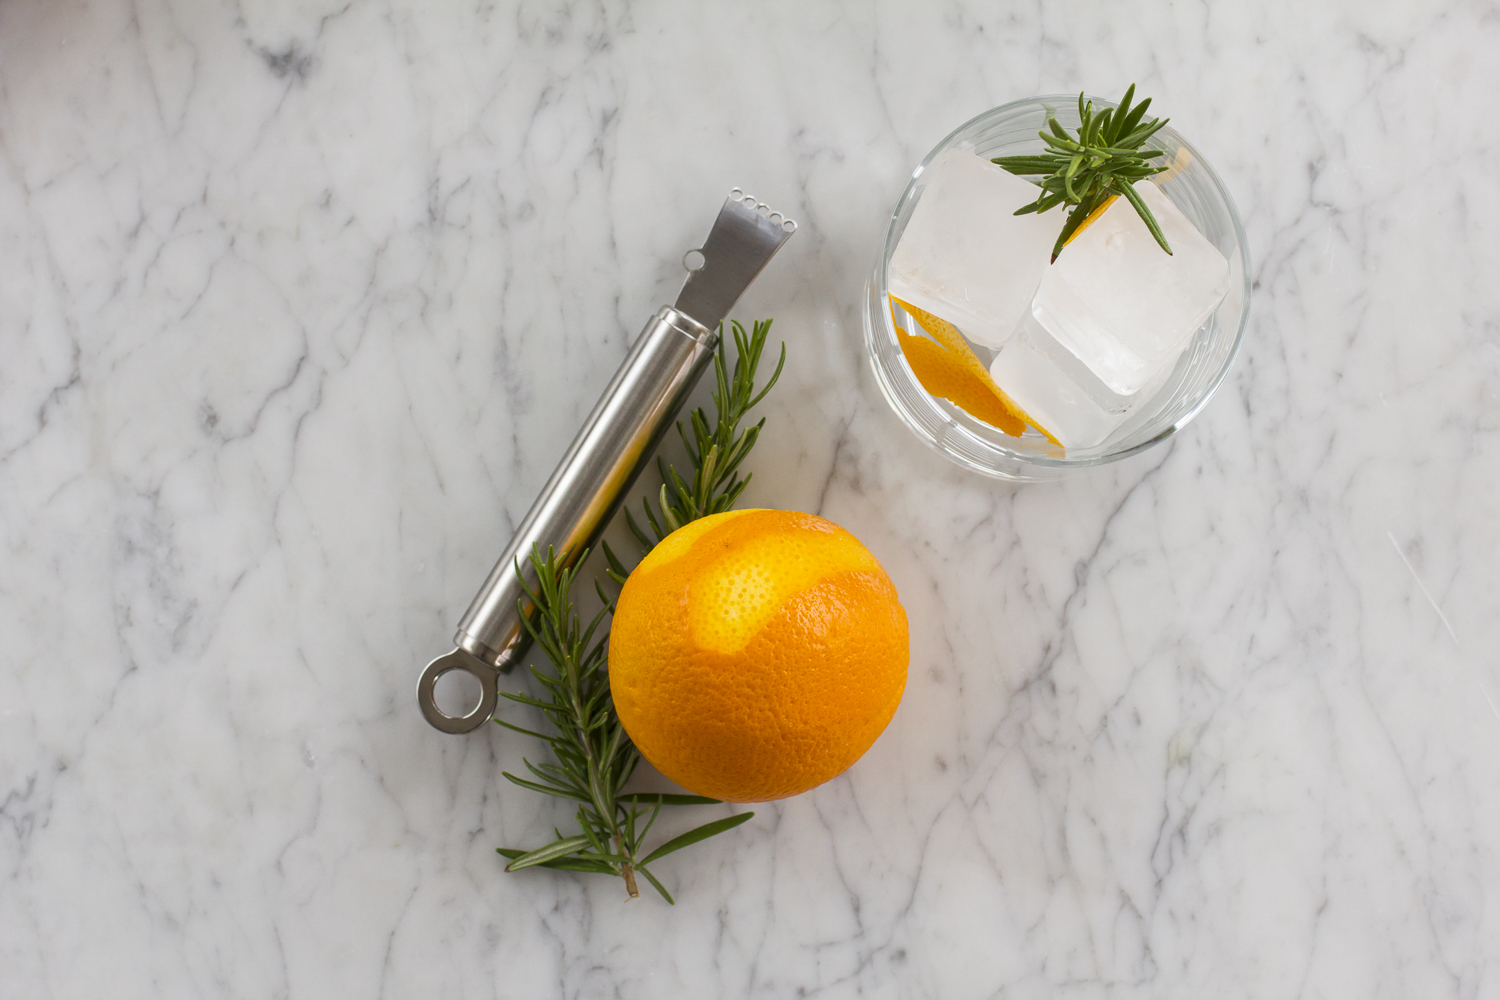
Rosemary and Orange Gin Mare and Tonic

Add ice, orange zest and rosemary sprig to a rocks glass.

Pour 2 oz Gin Mare

Add Fentimans Tonic to Taste

I fear I may not be able to go back. 

Rosemary and Orange Zest Gin Tonic © 2014 Helena McMurdo

If you liked this post, and would like to receive posts like it directly to your inbox, why not sign up for my email updates here.

Cookbook Review: The Preservation Kitchen

I'm excited to share a cookbook review that I did a little while ago and that is being published now over on cookthatbook.com. As some of you know, I've been lucky enough to enjoy a great collaborative working relationship with Jasmine over at Cookthatbook.com, having been a regular contributor over on her site and having a wonderful opportunity to indulge my love of cookbooks.

The Preservation Kitchen by Paul Virant & Kate Leahy, is a fabulous book that I discovered a few years ago and it really re-ignited my love of canning and preserving, the results of which have been seen on this blog recently.

But it all started back with this book and the recipe for Pear Vanilla Aigre-Doux, a delicious sweet and sour concoction whose liquor I could drink by the glassful.

The book is a mixture of canning and preserving recipes as well as planned menus that allow you to put your bounty of preserves to good use. Here are a few shots from my review. 

I hope that you'll check out the full review here.

Custard & Crumble Plum Tart

The rain is here but there are still plums in the markets and this tart is a perfect way to say goodbye to summer and hello to the fall. The custard cooks into the tart and gives it a certain, shall we say, gooey-ness. This is based on a recipe from an old Martha Stewart book. My favourite thing about the original recipe was the almond flavour imparted by the almond extract. My version increases the amount of almond extract and doesn't use any vanilla extract. I use prune plums because I like the way the little sliced pieces look when I arrange them on the top of the tart, but  but larger ones will do.

Plum Custard Crumble Tart © 2014 Helena McMurdo
Pieces of Plum Custard Crumble Tart © 2014 Helena McMurdo

Custard & Crumble Plum Tart

Crust & Crumble Base

218 g sugar

1/4 tsp salt

114 g (4 oz) cold butter, cut into cubes

Mix and rub together the above ingredients until you have a coarse meal. Divide the mixture in half  (about 257 grams each half) and set aside. To the remaining half add the following:

3/4 tsp cinnamon

1/4 tsp baking powder

1 egg

Press the wet mixture into a 9 inch tart pan. Bake in 320 oven for 10 minutes, then remove from oven and let cool.

While the tart is baking, prepare the custard as follows:


Filling & Custard

1 1/2 lbs plums, sliced in half or in quarters

1 egg

125 ml whipping cream

56 g sugar

2 tsp almond extract

Additional sugar for sprinkling.

Arrange the plums in a pattern of your choosing on the surface of the cooled tart crust.

Combine the egg, cream, sugar and almond extract in a bowl and beat slightly with a fork or whisk. Pour over the plums. Sprinkle the crumb topping you set aside earlier over the plums. Sprinkle approximately 2 tsp sugar over that.  Bake in a 350 F oven for 30 minutes. Then turn on the broiler and watching carefully, brown the top .

(Use your judgement - I sometimes feel like the remaining topping is more than enough so I often freeze any remaining crumb topping. It's great to have on hand for those times when you need an instant dessert - Just sprinkle over some fruit and your are done!)


Apricot Sultana Chutney

I may have come slightly obsessed with canning. Boiling water, glass and hot metal would normally be associated with danger and fear but for some reason, when these elements are employed in the processes of preserving, I find it all very relaxing. There is something very rhythmic and orderly about preserving. Yet it is unpredictable at the same time. A transformation happens, as you cook down your preserve, and you wonder,

"What will this be like in a few months?"

What can I say? I'm hooked. When I troll the farmer's markets these days I'm looking for anything that I can stuff into a jar. When I saw these amazing apricots I began dreaming up something I could do with them.

Beautiful fresh apricots © 2014 Helena McMurdo

While apricot jam would be the obvious and assuredly delicious choice, to be honest, I'm not a huge jam consumer. (If we are talking marmalade, that's a different story).

In this instance, something more savoury appealed. G and I  had made a tomato relish earlier this month and I liked the process, and the results, so I thought a chutney might be more on track. I will look forward to eating this with a beef curry recipe I often make during the winter.

Fresh apricots in mason jar © 2014 Helena McMurdo

I found a recipe on Canadian Living that I liked the sounds of, but I fancied a slightly spicer version so I altered the spices a bit, increasing the cayenne pepper called for in their recipe and using turmeric and cloves along with the cinnamon and ground coriander.

Spice mixture and sultanas in Apricot Sultana Chutney © 2014 Helena McMurdo

The preparation couldn't be easier. The most difficult task is to chop the apricots. And that's not hard. Invite a friend to make this with you and you'll save yourself some work and have a fun time too.

Chopping apricots for Apricot Sultana Chutney © 2014 Helena McMurdo
Apricots and Sultanas ©2014 Helena McMurdo

The ingredients all get put into one pot and heated. C'est tout! After my chutney had cooked down, I tasted it and decided it still needed a little something. I liked the idea of adding some smoky flavour and even more spice so I added some Pimentón Picante (Spicy Smoked Paprika). That said, the flavour mellows out a lot, so there is just a touch of nice heat combined with the sweetness.

Making Apricot Sultana Chutney © 2014 Helena McMurdo

This chutney smells absolutely amazing while it cooks. After you bring the ingredients to the boil, you will have a lovely hour and half of beautiful, sweet, spicy fragrance filling up your kitchen.

Simmering Apricot Sultana Chutney © 2014 Helena McMurdo
Filling jars with Apricot Sultana  © 2014 Helena McMurdo

I made this about mid August, and yes I should have waited, but I've already tried some. And I'm liking it.  If I'm being completely honest, whenever I'm canning, I secretly hope that one or two jars won't seal during the water bath because then I'll get to pop them in the fridge and eat them sooner rather than later. I also like comparing how things change as time goes on. Hope you enjoy this.

Apricot Chutney 9 ©2014 HelenaMcMurdo

Apricot Raisin Chutney

1 kg (9 1/2 cups) fresh chopped apricots

165 grams (1 cup) red peppers

165 grams (1 cup) sultanas

130 grams (1 cup) chopped red onion 

416 grams sugar (2 cups)

2 tsp mustard seeds

1/2 tsp each of: 

cinnamon

ground coriander

salt

1/4 tsp each of:

cayenne pepper

turmeric

ground cloves

smoked paprika (optional)

This recipe makes  8 - 125ml jars which I feel is a good size for gifts or for use in a short time once opened. Chop the apricots and add to a large heavy bottomed pot with all of the other ingredients. Turn on the heat to high and bring the mixture to the boil. Once the mixture comes to the boil, reduce the heat and keep it simmering for about an hour until all the apricots have dissolved into the mixture and it is suitably thick. What is suitably thick? I say that is up to you, but if you want to get technical, use the chilled plate method to test the chutney. Spoon a small amount onto a chilled plate and let stand for a few seconds. Then tilt the plate and make sure the chutney runs slowly. The hour cooking time is a guideline only. Keep an eye on it and keep checking.  I ended up cooking mine down for and hour and a half. Once the chutney is done, it's time to can. Just before you are ready, put your lids in a pan of hot (not boiling) water and sterilize your jars in boiling water. (Have the water close to boiling beforehand so you can time everything just right). Remove the jars from the boiling water and set on a wooden board or a countertop covered with a cloth. (You want to avoid a hard surface that could damage the glass jars). While both the chutney and jars are still hot, fill the jars leaving 1 cm headspace. Wipe the edge of the jars with a clean cloth and place the lids on top, securing the bands to what is called fingertip tight. To do this. I place the index finger of my left hand in the centre of the lid and then with a light touch, secure the band with just my thumb and second finger. This will make the band, just tight enough, to allow the expansion that will happen during the water bath. With a set of canning tongs, lift the jars into a boiling water bath. The water must completely cover the jars. The water temperature will descent with the addition of the jars. Once the water has reached the boiling once again, leave the jars in the water bath for 15 minutes. Once the time has elapsed, remove the jars from the water to the wooden board. The lids should pop and curve down very quickly (2-3 minutes) indicating that the jars are sealed. Refrigerate any jars that do not seal and use within about 2 weeks.  Put the rest away and use them up within 6 months. 

Dahlia Still Life

Here's the result of a little bit of play today. These dahlias caught my eye at the Kerrisdale Farmer's Market and I couldn't say no to them.

Dahlia Still Life © 2014 Helena McMurdo

Tarta de Santiago

I've said it before. I don't really need an excuse to make a cake but in case you do, here's one. It's the  25th of July which is the Día de Santiago  (Feast of St. James), and also Galicia's National Day. It seems like an opportune moment to share this recipe for one of my favourite desserts: Tarta de Santiago.

Tarta de Santiago © 2014 Helena McMurdo

Every pastry shop you pass in Galicia, is sure to have one in the window, no matter what time of year, the top dusted in confectioners sugar save for the the distinctive cross of Santiago.

In Spanish St. James is called Santiago. Yes I know. It's confusing and I could probably do another post just on the variations of the name James. That's St. James the Great, one of the 12 Apostles of Christ and the patron saint not only of Galicia but also of Spain. 

Tarta de Santiago in a La Coruña cake shop. © 2014 Helena McMurdo

St. James has had a long association with Galicia. Tradition and legend has it that after St. James' death in 44 AD his relics were taken secretly to Galicia where whoever did the taking, seems to have forgotten about them for some time. But in the 9th Century AD, his burial place was rediscovered in what legend says involved a spectacular display of lights in the night sky. On the same site, several chapels and the present day Cathedral of Santiago were built which has since become one of the most important pilgrimage sites in the Christian world, surpassed only by Jerusalem and Rome. Today, hundreds of thousands of pilgrims religious and otherwise make their way to Santiago along the route that bears his name.

But back to the cake, because that's why you are really here. Isn't it?

I'm not sure I remember the first Tarta de Santiago I ever had. I've been eating them for too long. But it almost certainly came out of the ubiquitous blue box, found all over Galicia,  of the Tartas Ancano. They are available in every supermarket and gas station in Galicia. On our recent holiday, as we stopped to say goodbye to some neighbours and one of the slim packages was pressed firmly into my hands with the words, "this fits easily in the suitcase". I found this to be quite appropriate as, some say, the recipe for the cake originated with a pilgrim on a his way to Santiago. A travel cake! This makes sense because it keeps well and I would imagine if you found yourself walking for days from France to Spain you'd be pretty happy for a piece of this.

In May 2010, the EU gave Tarta de Santiago Protected Geographic Indication (PGI) status within Europe which allows only cakes made within the Autonomous Community of Galicia and containing at least 33% almonds, to be marketed as Tarta de Santiago meaning  that if you were thinking of starting up your own Tarta de Santiago bakery,  anywhere other than Galicia, think again.

Metal Cross of Santiago for making Tarta de Santiago © 2014 Helena McMurdo

But fear not, your physical location won't diminish your enjoyment of this cake. If you believe the British newspaper reports, even HRH Prince George had one for his birthday. Even if you are not Galician or Spanish, or aren't lucky enough to have a Spanish nanny, you can still enjoy this one.

With nothing but eggs, sugar, almonds, and a pinch of cinnamon and a zest of lemon, this cake appeals to me based on its pure simplicity. It is  filling and satisfying. I love to eat this on its own but topped with some fresh cheese it is truly divine. Some recipes call for a separate crust which is then filled with the cake mixture but I prefer this version - all cake!


Tarta de Santiago © 2014 Helena McMurdo

I finally bought one of the special cross templates this year in Spain but you can easily substitute a printed piece of paper which is what I did for many years before I had the fancy template. I've made a template for you to use which you can download here.


Tarta de Santiago

250 grams sugar

250 grams ground almonds, preferably Marcona

5 eggs, yolks and whites separated

pinch of cinnamon

zest of one lemon

Grease one ten-inch or two seven-inch springform pans and set aside. Preheat the oven to 320 F/ 160 C.  Beat the yolks and sugar together until they are well mixed. Add the almonds to this mixture along with the the cinnamon and lemon zest and mix until the almond is evenly incorporated, being careful not to overmix. Beat the egg whites until they have stiff peaks and then fold this into the yolk/almond mixture. The batter will remain slightly lumpy, but it should be evenly lumpy. Spread the mixture into the cake tin, place on a baking sheet and cook for approximately 40-50 minutes. The top of the cake should be a beautiful golden brown.

Remove the cake from the oven and let cool completely before removing from the pan. To decorate, place the template on the top of the cake and lightly dust with confectioner's sugar. If you decide to use another design, don't worry, it will taste the same. But it won't be a Tarta de Santiago. Enjoy!


Hoguera de San Juan

Galician Saying: Nas meigas non creo, pero haberlas hailas

Translation: I don't believe in witches, but there are definitely some of them around.

On the night of the 23rd of June, my Abuela had the doors of the house decorated with garlands of flowers. You know, to keep out the evil spirits. Obviously. Some of us were staying in another house nearby and I was informed with a wink from my mother that I would be responsible for adorning it in the same fashion, and absolutely, by no later than midnight. My grandmother assured me as long as I had it done by morning, I'd be OK. Phew. Good to know that the evil spirits take it easy on newcomers.  

Enramada de San Juan. © 2014 Helena McMurdo

Our trip to Spain this year coincided with something that I hadn't experienced before, the Fiesta de San Juan. While it is held on the Christian festival of St. John the Baptist it is really a pagan festival to celebrate the summer solstice. And in Galicia they take it particularly seriously. It is marked with the lighting of bonfires (hogueras), the burning of old things, eating of sardines and drinking of Queimada. We'll get to that.

My brother and sister got to making our fire. As Canadians, we have some experience with campfire which we found to be transferrable to the Galician bonfire situation. We had some problems with shifting wind and intermittent rain but before long, our fire was burning bright.

Shifting winds © 2014 Helena McMurdo
Hoguera de San Juan © 2014 Helena McMurdo

Traditionally, the men and boys jump over the fire three times and make a wish. Just guessing but maybe they are wishing they don't fall in the fire? The women in our family were not to be outdone and we all took turns jumping the coals (once the fire had diminished to reasonable size of course) and I'm glad to report we are all still here to tell the tale. But don't try this at home. I can't be responsible for accidents.

Fantasma de San Juan © 2014 Helena McMurdo

And now for the queimada, the typical drink of the night of San Juan. I have written about this before. Yes, here in the safety of our Canadian family home, we have been known to light some high proof alcohol on fire at least once or twice. But doing this in the open air, in the home of queimada was very special. We used a large shallow pot, a bottle of Aguardiente de Orujo, (sort of like Grappa), and flavoured it with coffee beans, and lemon and orange peel. We all took turns stirring the pot, as is tradition, and our cousin Tereixa, a wonderful orator, read the conjuro or spell to ward off the evil spirits and to invite the departed souls to join in with us.

El Conjuro de La Queimada © 2014 Helena McMurdo

 And looking at the picture above, I'm pretty sure that some of them did. Yes, there are definitely some of them around.


Arde Lucus: My Roman Holiday

I wanted to share one of the really special things that we experienced while we were in Galicia this time: The Arde Lucus Festival in Lugo. Now I had been to Lugo once or twice before. As some of you may know, I was born there so this wasn't my first trip. But to see it in this way was an extra special treat.

Roman Costume at Arde Lucus. © 2014 Helena McMurdo

The area of Lugo was originally a Celtic settlement, dedicated to Lugos, the Celtic god, of among other things, light. Depending on your point of view, the area was either a) conquered, or b) pacified by the Romans in 13 BC who built the city which they named Lucus Agusti. By the 3rd century they had surrounded the city with fortified walls mostly to protect the city from the local tribes. The walls still stand and today are described by UNESCO as "the finest surviving example of late Roman military fortifications".  In 2000, the walls were declared a UNESCO World Heritage Site.

Arde Lucus festival is a celebration of this Roman heritage. If you have ever been in Spain for festivals like Pamplona's San Fermin or Sevilla's Feria de Abril, you will know that they are spectacles of colour and pageantry. And Arde Lucus is no different in that respect. This is no sweaty fraternity toga party. This is the full set of Gladiator. With 600,000 visitors over 3 days, it is a sight to behold. 

Catedral y Muralla de Lugo © 2014 Helena McMurdo
Romans catching up with the news at The Arde Lucus Festival  © 2014 Helena McMurdo

For me one of the highlights was the way the families approached this event, all dressed up together and coordinated. We even saw baby carriages decked out like Roman chariots. They went to such great effort, each putting their own spin on things. It was lovely to see everyone getting into the spirit of things. Of course, there were events and spectacles like a Roman Circus to behold, but for me, the fun part was the people watching. The variety and quality of the costumes was astonishing. And of course today, Romans and Celts mingle in the streets with little animosity. 

A young gladiator at the Arde Lucus Festival © 2014 Helena McMurdo
Celts at The Arde Lucus Festival © 2014 Helena McMurdo
Family at the Arde Lucus Festival © 2014 Helena McMurdo
Roman Warrior at Arde Lucus. © 2014 Helena McMurdo
Roman Hair. Arde Lucus © 2014 Helena McMurdo
Lugo, Arde Lucus Festival  © 2014 Helena McMurdo
Calle de La Cruz, Lugo, Arde Lucus Festival  © 2014 Helena McMurdo

Of course, we joined in the fun in the bars and restaurants. As we stopped in one restaurant in the narrow street above, we sipped our wine happily, while past the doorway marched legions of Roman soldiers, with their drums and cavalry to boot. For a brief moment I thought of what it must have been like to be a Celt living in a straw covered hut, seeing the Romans marching in and wondering how life would change. But then I took another sip of wine. And everything seemed fine.

A truly special display, and if you find yourself in this part of the world around the middle of June, you might want to consider investing in some Gladiator sandals. In 2015, Arde Lucus will take place June 19-21.

Recent Client Work: Meridian Meats

I have been excited to share some work I did a few months ago for Meridian Meats. Meridian Meats is a chain of full service butcher shops providing quality meat and seafood. Recently I helped them with some photos to showcase the friendly staff and thoughtful service in one of their new stores, Meridian Farm Market in Tsawwassen.

© 2013 Helena McMurdo. All Rights Reserved. Do not reproduce without permission.

© 2013 Helena McMurdo. All Rights Reserved. Do not reproduce without permission.

Along with the great meat and seafood that Meridian Meats is known for Meridian Farm Market brings a beautiful selection of fresh vegetables in a wonderful space and friendly and helpful staff.

© 2013 Helena McMurdo. All Rights Reserved. Do not reproduce without permission.

© 2013 Helena McMurdo. All Rights Reserved. Do not reproduce without permission.

This was a super fun shoot to work on. I was excited to hear that Meridian Meats have opened a brand new location for Meridian Farm Market in North Vancouver. You can find out more about them here.

© 2013 Helena McMurdo. All Rights Reserved. Do not reproduce without permission.

© 2013 Helena McMurdo. All Rights Reserved. Do not reproduce without permission.

My Galicia on Instagram

Usually, I don't post Instagram photos here but I thought it would be fun to share just a few from my recent trip to Galicia. You know what they say, sometimes the best camera is the one you have with you. These are definitely some of my favourite moments from my recent trip and they are not diminished for me by the fact that I shot these images on my phone vs my real camera.

misssilenth's photo on Instagram

If you want to see more you can check out my instagram feed here.

Breaking Bread: Pan do Seixo

Last May when I was in Galicia I spent some time with a local bread man. To my grandmother and the neighbours he is referred to as Seixo (pronounced say-show), a name that reflects the town where he is from rather than any name his mother gave him. Seixo is a little town in the mountains, not far the ancient village of Cebreiro on the Camino de Santiago. The bread that this man makes is called Pan do Seixo. 

Pan do Seixo Loaves ©2013 Helena McMurdo

The bread is crusty and chewy and filling. When the locals cut it, they hold it tightly between their arm and their body and cut off a slice, one-handed, as if it could somehow get away from them.

Pan Do Seixo © 2013 Helena McMurdo

Seixo is a daily visitor, showing up around 10 o'clock in his little van and beeping his horn. If you want bread, you're ready and waiting with your euro in hand. If you don't you wave him off and he continues on his journey through the green hills of this part of Lugo province. 

Near O Cebreiro © 2014 Helena McMurdo

I asked him if I could spend some time with him and see how this bread was made. He generously obliged. After spending most of the morning delivering, he starts baking at around 4pm. My mum and I made the short trip into the hills through some pretty windy roads to a most unlikely place for a bakery. And not any bakery. One that in addition to servicing restaurants and locals, ships bread, twice a week, more than 900 km to shops in Barcelona. The authentic Galician character of his bread is much sought after by Gallegos living in the city. He told me he started out just shipping bread to a few friends that had a shop. The bread became known by other Gallegos living in the Barcelona and the demand grew.

Despite the rustic surroundings, and the artisanal nature of the bread, the bakery itself is fairly modern.  But some traditional touches remain.

The oven is a state-of-the-art, modern one, with a rotating conveyer belt allowing Seixo to cook 80 loaves at a time. But then you see how it's fired. With wood. A delightful mix of old and new technology.

He uses a mixture of yeast and ferment (what we would know as a starter or biga ), as well as a blend of commercial wheat flour and a locally grown Galician flour. He makes two main loves a wheat loaf and a rye loaf.  

130604_092013_4294.jpg

Once the dough is mixed in a modern, commercial mixer, it is cut into portions and left to proof in a traditional dough trough called an artesa. My mum remembers that in the old days when everyone made their own bread at home, every house had one of these. It's sort of a coffin shaped box on legs with a wood cover.

Cutting the dough ©2013 Helena McMurdo
Artesa first proofing © 2013 Helena McMurdo

After an initial proofing in the artesa, the dough is weighed and divided into individual portions and formed into balls (bollas) which are placed on a board for a second proofing.

Forming the bollas ©2013 Helena McMurdo
Proofing the Loaves © 2014 Helena McMurdo

After the second proof, of approximately 40 minutes, it's time for the oven. This is rapid fire, co-ordinated team work. With Roberto, bringing out the wood trays, and Seixo forming the bollas into their final shape, slashing the tops where necessary, the two men entered into a rhythmic dance. 

Pan do Seixo Bollas ©2013 Helena McMurdo

Working in batches they used a conveyer belt to load the bread into the oven, depositing it on the shelves. In no-time, approximately 80 loaves were in the oven and browning nicely.

Loading the Conveyer ©2013 Helena McMurdo

The thing that struck me most in the 4 hours I spent with Seixo and Roberto was the pace of work. It was non-stop. And they work hard. When he wasn't actively making bread and sometimes when he was, Seixo was fielding calls on his mobile phone, taking orders, doing business.  A man in demand.

Seixo on the Phone © 2013 Helena McMurdo

When the bread was ready, Seixo asked me if I wanted to try a treat from the old days. He explained this was a traditional snack that he had as a kid. He ripped into a warm loaf and sprinkled it with sugar and olive oil. Heaven. 

On the conveyer ©2013 Helena McMurdo

We left his home at nine at night, dead on our feet but with smiles on our faces. The next day he was back at our house, beeping his horn. No rest for him.


Spring for Leek & Potato Soup

I can confirm that we are most definitely still experiencing what some have called Cool Spring here in Vancouver. 

Trailing Cherry Blossoms. Photo © 2014 Helena McMurdo

The first blossoms are coming out and the sun does poke its head out from the clouds, but there is still a chill in the air. I'm not ready to bare my legs just yet. In fact a cozy cowl neck  would suit me just fine. And to eat, I crave something warm and nourishing. This Leek and Potato soup is not revolutionary but it is simple and comforting and feels just right at this time of year.

Nourishing Leek & Potato Soup. Photo © 2014 Helena McMurdo

Leek & Potato Soup

4 potatoes (I used Yukon gold)

4 leeks (white and pale green parts only)

1 onion

500 ml chicken stock

salt & pepper to taste

Peel and dice potatoes. Coat with olive oil and roast in the oven until tender (10 to 20 minutes depending on your dice). In the meantime, finely chop an onion and sauté in olive oil on low to medium heat in a large saucepan. Clean the leeks thoroughly to remove any sand or dirt. Finely slice the leeks and and add to the onions. Sauté until soft and buttery. Add the potatoes and the chicken stock and simmer until all vegetables are soft. At this point remove from heat and cool slightly. Use a hand blender to purée the mixture. If you are eating the soup right away, add a little milk to taste and until you have a consistency that you like. If you would like to freeze the soup, I suggest omitting the milk. It can be added later on when you are ready to eat.

Enjoy. I'm sure Warm Spring cannot be far away.